Search This Blog

Popular Posts

Friday, 14 February 2020

Knit Update

Hi Everyone 
Today, I’m sharing progress with my latest sweater knit, the St Catherine by Kate Davies. As my photo story shows, this is my second St Catherine.

              
This time, I’m using a different yarn. My first version used a sports weight yarn and the whole project was a ‘breeze’. I’ve had a bit of a trial this time ! I’m using a 4ply merino half together with a Kid Silk. You can check out my initial post introducing the project here, where the yarn is highlighted.
So, I think, the problem lies with the size of the needles and the combination of yarns. It’s not a big deal but I’ve pulled out the project three times. I wanted a soft and slightly drapey fabric for the cardigan and as such have chosen to use 5.5mm needles. I think, I’ve managed to get the dimensions right in my latest version. 
There has been frustration about progress. I feel, I’ve wasted quite a bit of time re knitting the first section of the cardigan. There are quite a number of stitches in this section and it’s been necessary to spend a few days worth of knitting time on each version ! However, moving on, I think all is well. I’m about 3/4 of the way through the first section. St Catherine is a very clever construction and I love the way the separate parts build up a beautifully, fluid shape. The next bit will be the back and I’m hoping I’ll be there in a few days.
I love the colour and texture of the new cardigan, I’m already thinking about sewing projects which I can start to compliment my new cardigan. I don’t have many green items of clothing in my wardrobe so lots of new opportunities.

Thanks for calling in today. Have a great weekend and I’ll be back next week with more Making stories.


Thursday, 13 February 2020

Silver Sample (13/2/20)

Hi Everyone 
This weeks Silver Sample is still in the design stage. I’ve done a preliminary sketch and made up some copper prototype samples. I produced the copper components simply to assess the size and I’m happy with each component. The idea with this design is to produce something which is alike rather than the same. I’ve decided on an overall size of earring and made up slightly different earrings, using different sized flattened rings. The prototype copper rings, have not been flattened or soldered yet.


My final plan is to attach two Sterling Silver smaller (pebble shaped) rings together, to form one component. This will be equal (in size) to one larger ring. I’ll attach long Sterling Silver square hooks to the top of each component. I’ll also make a second pair of earrings with small, short ear posts. Both sets of earrings will be relatively small, I’m not especially comfortable with large earrings. I feel there are lots of large earrings (on the market) in the style of my samples so my aim is to produce something on a smaller scale. I’m hoping one set will be for me !  The pebble/ring components measure around 2cm, so quite small.
I’m also going to use the copper components in a third pair of earrings. I’ll give the earrings Sterling Silver (short) posts and add enamel to the copper, I’m not sure of the colour, at this point ? I’ll share the final items, next time.

Thanks for calling in today.


Wednesday, 12 February 2020

Fabric Design

Hi Everyone 
I’m talking about fabric design today.
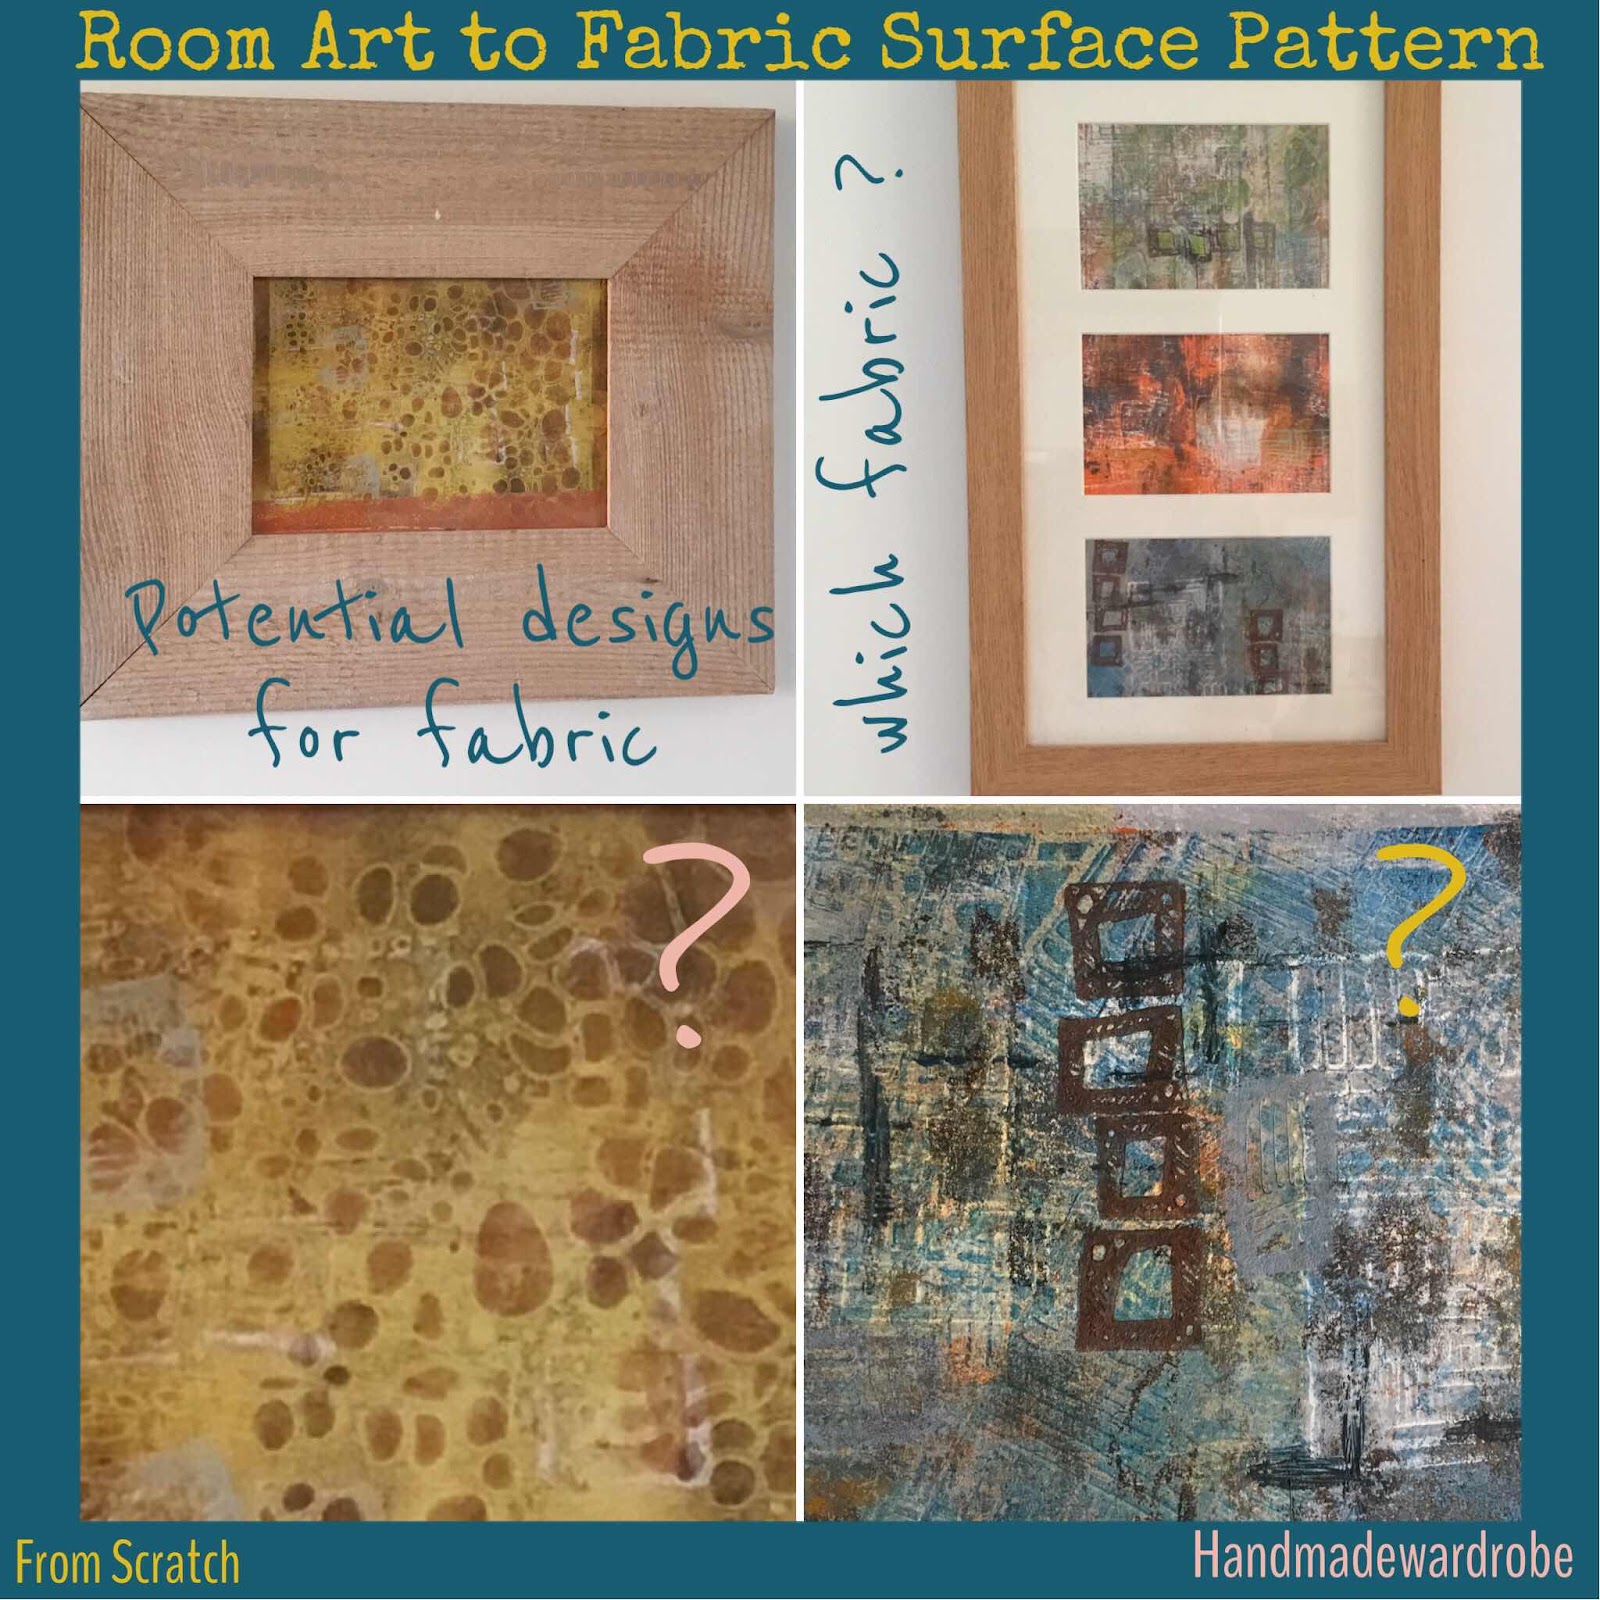
I’ve dabbled in fabric design a few times and have a number of my designs on fabric, particularly my Miss Mitchell designs. My latest experiments with fabric design have come to the stage where I need to make some decisions about where to go next. Ive been working with more abstract designs and have produced a number of acrylic prints, which appeal to me for dress fabric. I‘ve narrowed down a selection of two designs and now need to decide on the type of fabric I’d like to go for.


As you see from my photo story, I have two pieces which are framed and on the walls (top right and left). I’m especially drawn to the design (bottom right). These colours are muted blues and browns, I love the combination and can see a dress in this fabric. However, I also like the yellow/mustard tones of the alternative (bottom left). Both framed pieces are in my eye-line everyday and has prompted me to move on this idea.
Custom printing with fabric is quite an expensive thing, so I want to be sure about which fabric and how much money I want to invest in this project. Initially, I was thinking about a cotton jersey and a tunic of some sort ? However, I’m now moving towards a cotton lawn and a dress, possibly lined ? I think, I need to acquire a few swatches before making my final decision. 
I’m also looking for a suitable dress pattern. I want to be sure about my decision before committing to the fabric run. I’m hoping, I can complete my research over the next week or so. I’ll let you know how I my decisions go.

Thanks for calling in today.


Tuesday, 11 February 2020

Boxy T Shirt Two

Hi Everyone 
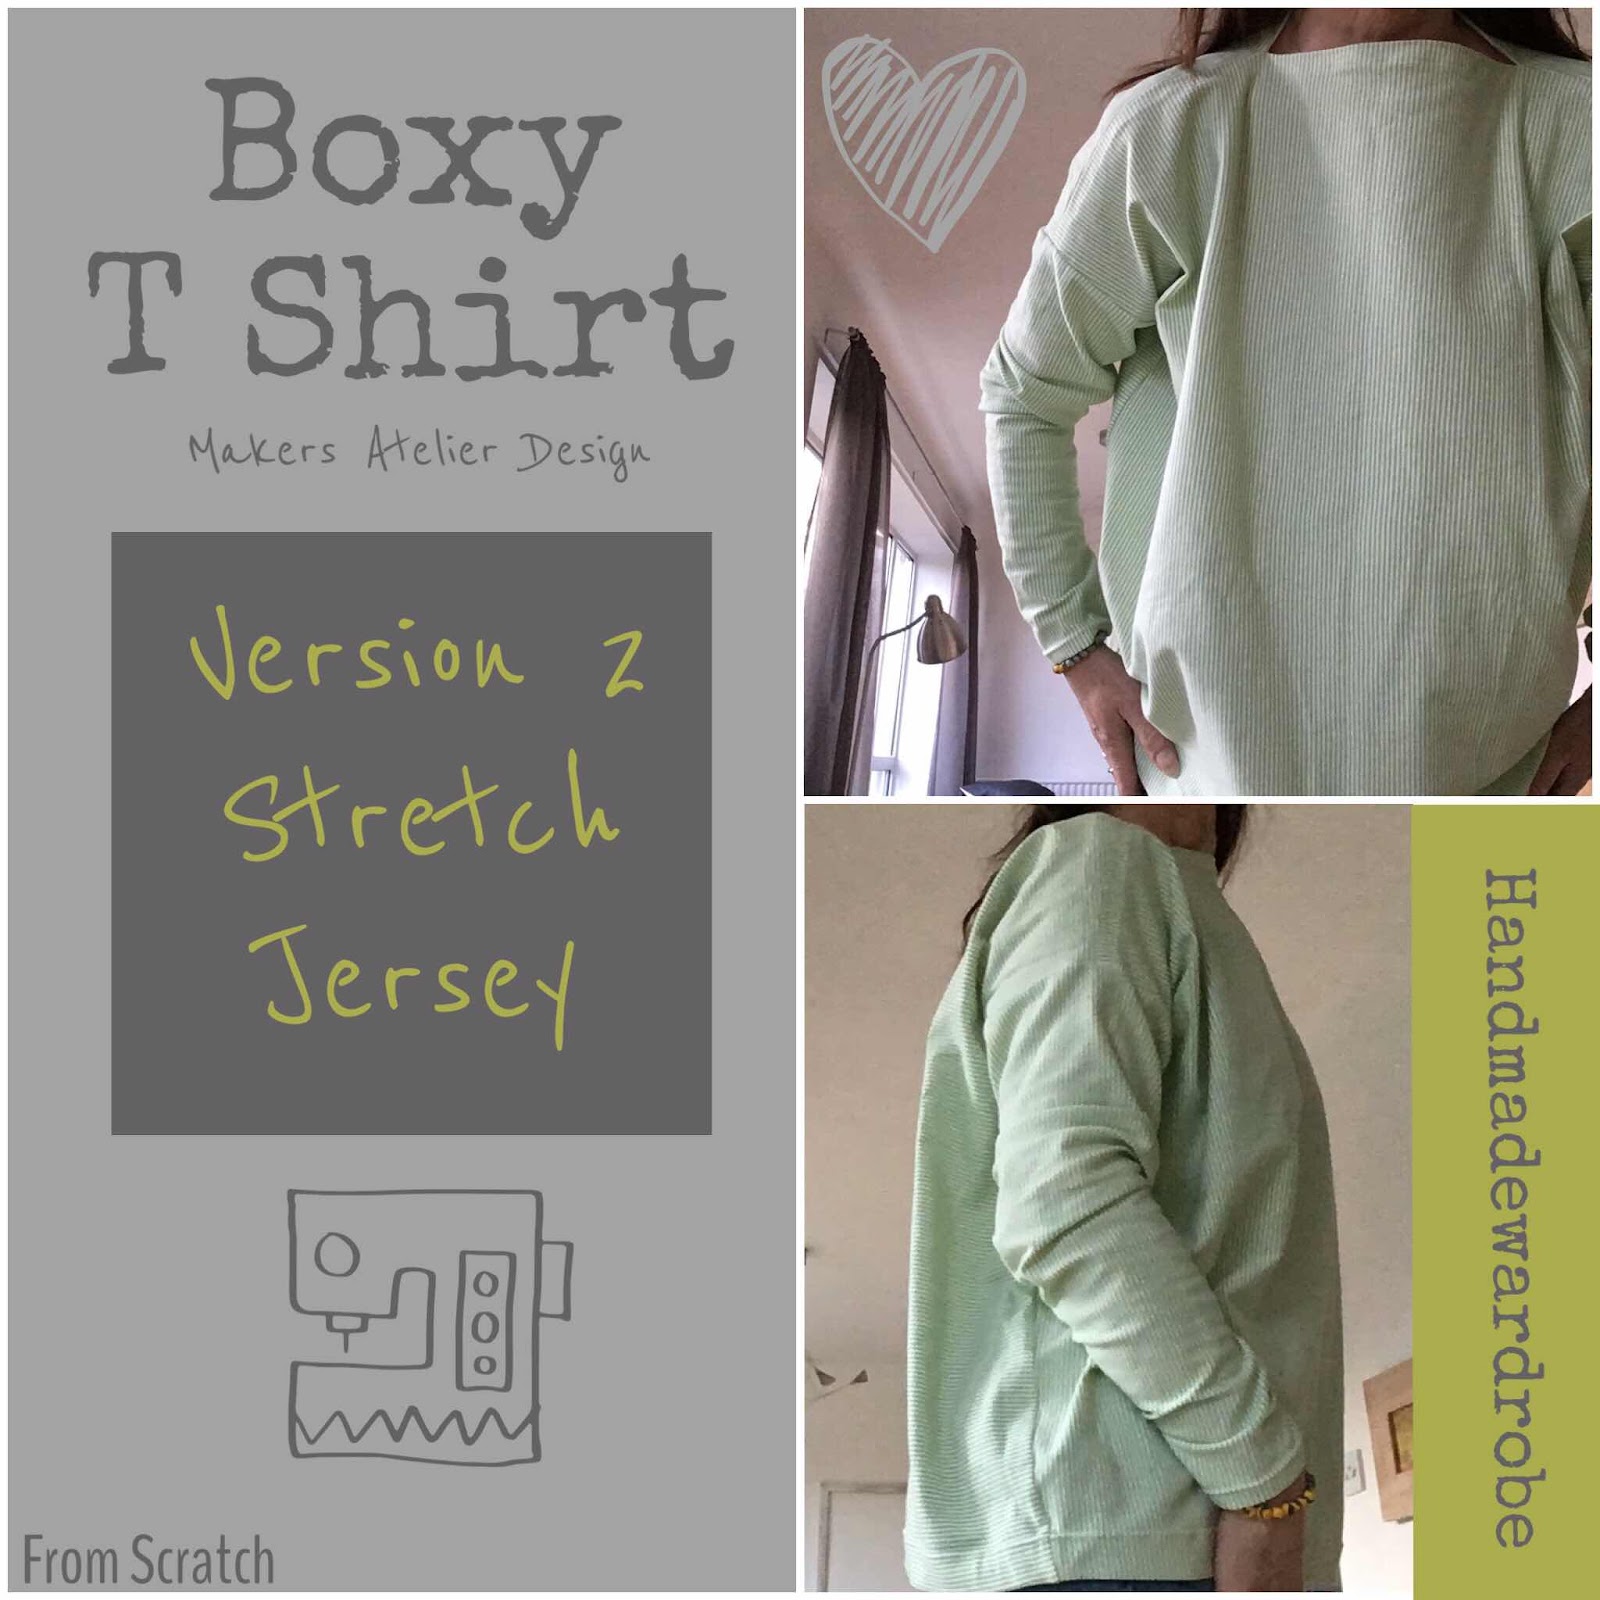
I’m sharing my second Boxy T Shirt today. Check out yesterday’s blog for details of the first. I’m using a pattern from Makers Atelier as a basic template for this project, although the final T Shirt is a very different garment. I had thought I was finished ! However, I’ve been test wearing the T shirt around the house ( only for an hour or so) and have quickly decided the sleeves need a bit of work. Here’s a quick look at the current T Shirt :


The sleeves look OK (for me) in the photos but as I move around and get on with life, they are too long and not quite tight enough to stay in my desired position. I was finding myself fiddling around with the bottom of the sleeves, most of the time. I had thought, I could take in the sleeves, slightly, to use the width of my arm to keep the stretchy fabric, in place. This is a minor issue but will make quite a difference to the T Shirt.
I like the boat style neck and the boxy shape of the T Shirt. I also like the length of the T Shirt, I usually go for a cropped length because I feel it suits my body shape but this time the boxy shape gives a nice profile to the garment. I love the colour of the fabric and the tiny stripe detail of the pattern.. The only issue seems to be the lower part of the sleeves. So, I’ll cut off the current sleeve hem, take in the sleeve seam and re hem. I will try unpicking the hem first, I have a feeling the stitching will have damaged the fabric of the current hem. Hopefully, my new T shirt will be perfect in a day or so.

Thanks for calling in today.


Monday, 10 February 2020

Boxy T Shirt News

Hi Everyone 
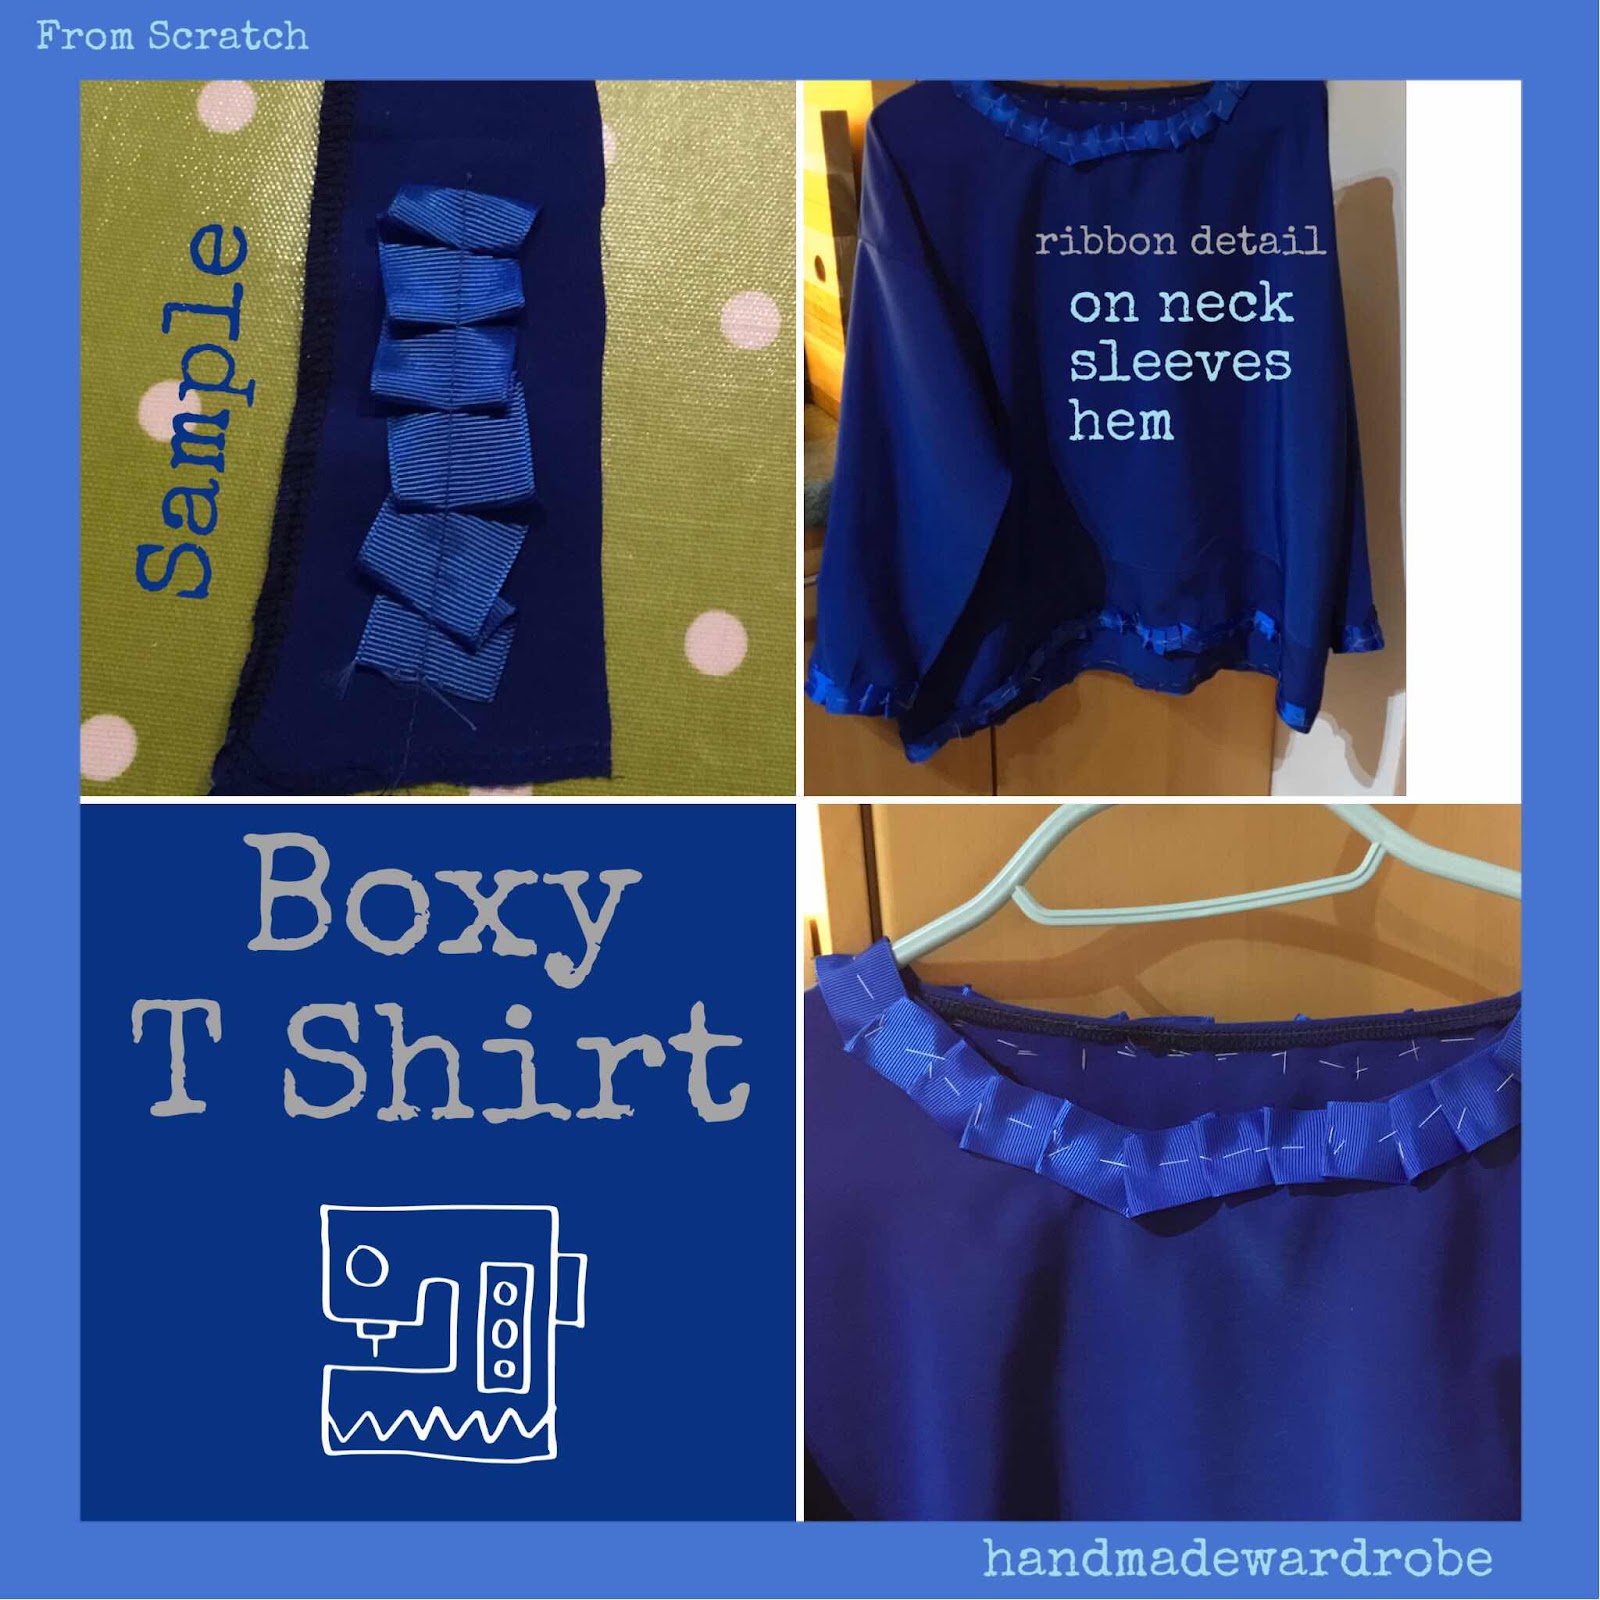
Last week I introduced a couple of examples of the Boxy T Shirt project. You can check out my original posts here and here. I’d already completed the basic construction of the first woven, blue sample and was about to start a stretch version in a green and white stripe ( more about version 2 tomorrow). I’m almost done with both. There have been a few issues ! I made quite a few changes to the pattern for both T Shirts. The blue version was recut in a few significant places, the neck and the sleeves needed to be changed, quite dramatically but I’ve finally managed a reasonably good fit. One of the optional features of this version of the Boxy T Shirt is a folded ribbon detail. This attracted me to make the T Shirt in the first place, so quite an important feature for me. So, I’m there - I have all the ribbon sewn in place and only need to remove the basing stitches.


I’m happy with the results of this project. I adapted the methods suggested in the pattern instructions for getting the ribbon onto the T Shirt, it looks a very simple task. However, not the case ! The instructions from Makers Atelier suggested ironing the folds and applying directly onto the T Shirt. I found this very difficult. I tried a few different approaches and produced a few samples (see my final sample method top left image). Eventually, I worked out a method of folding, pinning and basting to the final position. I then, used my sewing machine to attach to the T Shirt with a single, straight stitch down the centre of the folded ribbon. The result is quite dramatic. I wanted to achieve random folds (of the ribbon), again not as easy as it sounds ! 
The T Shirt is a very simple design but I like the fabric choice, the colour is a wonderful blue and the folded ribbon is the stand out feature. It looks quite dramatic but very simple. I feel the top can be dressed up or down to suit many different occasions. I can’t wait to get the final basting stitches out so I can wear my T Shirt. I’ll get some images of me wearing the garment later in the week.

Thanks for calling in today.