Search This Blog

Popular Posts

Friday 28 November 2014

The Christmas Collection @ thepapersac


Hi Everyone
It's the roundup of my 12 Days of Christmas Jewels @ thepapersac. I've been involved with this project for the last 3 weeks designing and making lots of the items. I've really enjoyed the making part - I usually like the design bit and not the making up so much.

Here are a few photos of the whole collection.

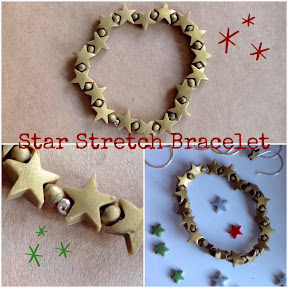
Week 1- Star Bead Collection


Week 2 - Bicone Bead Collection


Week 3 - Rounds Bead Collection


Most of the items have been sold but I will put the remaining stock in my shops over the next few days. Thank you to everyone who has bought the items.

Last night, the Collection went on tour to a local charity event and formed part of a big raffle prize. Three winners will attend some of the craft workshops Im doing and four more could choose their prize from jewels on the tree. I didn't get very good photos of the tree but this gives a bit of an idea of how it looked.
This is pre tinsel and baubles but you get the idea.


I added more than the 12 Days stuff and eventually had 21 items to fill the tree. A few bits of bling from some tinsel and the tree looked great. Prizes chosen were these 4 pieces. I asked each person why they chose a particular item and everyone said they just liked it - no other reason !


Thanks for reading. Hope you enjoyed the Series.

Thursday 27 November 2014

Rounds Necklace.


Hi Everyone
I can't believe it's the last of 12 Days of Jewellery @ thepapersac. The idea behind these little projects was to give ideas to make jewellery Christmas gifts. The mini projects needed to be quick and easy to make (in possibly batches) I've done this myself - so I know it works and am confident about the process.

My personal gifts are almost complete (amazing for me at this stage) and the best tip I have is to plan upfront - decide exactly what you want to make at the beginning. My life doesn't usually work like this. I will have an idea and then another and another etc. - mine is a creative thing but a time consuming business. Often, I end up frustrated and stressed out due to lack of time. Not this year !!!

Back to the final piece. It's a necklace based on the Rounds Beads, I'm simply calling my necklace a Rounds Necklace. The Rounds Beads are explained in Monday's blog (24/11/14)
Here is my necklace :


I've used a random collection of Christmas colours (you can use any colours) and threaded them onto red wax cotton. Measure the final length of the necklace you want to make and add an overlap for adjusting. There are 5 red Rounds at the back, acting as a 'stopper' for the adjustable length. I made the 5 individual beads and pressed them together with a hole through the whole thing prior to baking. I've finished the ends of the cord (after toeing a slide knot on each side) with 2 small Rounds.
The necklace is really attractive and so simple to make. I've got about 80 beads in the necklace but as they are punched out they are quick to make. Some beads are cut from thin raw clay (number 4 on the pasta machine) and others from thicker (number 1 on the pasta machine) - you can use any thickness and I feel the variety gives the piece a more attractive look. It doesn't matter if you don't have a pasta machine - just roll out the clay.
The whole collection of beads took about 20gm clay - tiny amount for such a large piece.

I hope you have enjoyed seeing the whole Christmas Collection coming together. Tomorrow I will post all 12 - plenty time to get making.

Thanks for reading.

Wednesday 26 November 2014

Rounds Stretch Bracelet - 12 jewellery days @ thepapersac


Hi Everyone
Today, it's day 11of the '12 days of jewellery @ thepapersac', I couldn't work out which day it was yesterday ! That means it's almost at the end - only 1 more jewellery item to go.

I've enjoyed making these items and have developed a few of the pieces into kits. These kits will be an ongoing thing and I'm hoping to develop different colours and finishes for the beads.

This week it's the Rounds Bead Series. The Rounds beads are explained in Monday's post (24/11/14). My jewellery item for today using the Rounds beads is something I'm calling a 'Rounds Stretch Bracelet.


Ive used a mix of Old Gold and Silver clay for the beads. These beads are made with the smallest round punch I have. Each beads measures 0.7 cm across. Because the individual beads are quite small this bracelet needs lots of them (50 gold and 30 silver). Collectively the beads give a solid type structure to the bracelet. I've tied a length of stretch string with a surgeons knot and hidden the knot inside 3 'rounds' ( see above left photo), this gives the bracelet a neat finish. That's about it for the design. It's a very simple piece to make and I like the colour mix, hope you are inspired to make one of your own.

Thanks for reading.

Tuesday 25 November 2014

12 Days of Jewellery for Christmas - bit of 'bling'


Hi Everyone
Today, it's day ? of the '12 days of jewellery @ thepapersac'. This week it's the Rounds Bead series. My jewellery item for today is a pair of Dangle Rounds.


The beads are very simple thin (clay rolled to number 4 in the pasta machine). I've used 3 discs per earring but you could use more and with different colours/textures etc. I've punched round shapes in the clay and simply made a large hole in the centre. The holes do need to be quite large to allow them to move around the wires. The movement is a key element of the design. I'm going to try out some gold leaf to clay and use a similar design for a change.The discs are easily removed so you could add a few different disc beads to allow for a different look.
A good point to note - I've used a gold plated wire but any wire could be used. I don't usually use plated wires but I've tested this one and I do like it (I've had very sensitive ears in the past and avoided plated wires). Certainly for Christmas, these earrings provide a bit of 'bling'.

I hope you feel inspired to have a go at this design. It's quick and easy as a 'gift make'.

Thanks for reading.

Monday 24 November 2014

12 Days of Christmas Jewellery


Hi Everyone
We are in week 3 (the final week) of the '12 days of jewellery @ thepapersac'. This week it's the Rounds Bead series. My jewellery item of the day is a pair of Stud earrings using a basic round punched shape. I've embellished the shape with a star - this star is a very thin version of the stars used in week 1 (10/11/12 post).
To make the Rounds range of beads, I used my pasta machine (number 2 setting) to prepare the clay for punching out (same process again as week 1). I used the middle size of round punch for my Round Star Studs (1cm across). A very small quantity of clay is required for a single pair of earrings. I planned to produce my whole Rounds series ie 4 jewellery pieces and prepared the basic beads as a batch. This planning does help make production times efficient. For each single round red shape, I made a thin star shape in Old Gold and baked the beads. I've placed the stars just off centre, I like the look this gives the piece.


The posts are glued onto the round shape after the first bake (to secure while I move to the next process). I embed the posts with a tiny piece of clay and mold into the round shape. I bake the bead again, this gives the earrings a smooth and clean, secure post for the back of the earring. The earrings are sealed and polished before packaging.
I'm making a few of these designs for little presents, they are ideal for placing in a cracker and quick to make. The gold stars give the earrings a festive theme and look pretty. As usual I've made myself a pair !

Hope you are inspired.

Thanks for reading.

Friday 21 November 2014

12 Days of Christmas Jewellery


Hi Everyone
Today, it's the round up of all the Bicone bead pieces of jewellery featured this week. Go back to 17/11/14 for the initial technique used in this section of the 12 Days of Christmas Jewels @ thepapersac.

In my design suggestions this week, I gave an Old Gold pair of stud earrings, a Bicone drop earring on silver or gold wires, a stretch Old Gold bracelet (with a single red bead) and finally a stretch necklace on a chain.


My favourite this week has to be the Bicone Bead Necklace. I will be using this design again and am already planning some beads for the job.

Each piece has a place in own my planned Christmas outfits (sounds organised ? ) but Ive been trying out samples and can't quite wait for Christmas !

Hope you enjoyed the Bicone section. Next week we will have the last bead shape with 4 more items. I can't quite decide which pieces I will make for my presents. I think, I need to wait until next week.

Have a great weekend.

Thanks for reading.

Thursday 20 November 2014

Stretch Bicone Chain Necklace


Hi Everyone
Today, it's day 8 of 12 Days of Jewellery @ thepapersac and the item of the day is a Bicone Stretch Necklace - yes, 'stretch' ! As usual, the technique for making the beads can be found at the beginning of the week (17/11/14) post.

Todays design has come from my attempts at finding a neat and easy clasp idea. My solution this time is to avoid the clasp altogether ! I'm not sure why this causes me so much grief but I do spend lots of time thinking about clasps. I wanted to use the stretch thread idea to allow for a shorter necklace which will go over the head (without the need for a clasp).The stretch characteristic is a great option for this particular design. My design is very easy and will adapt to lots of different beads. Here it is :


The coloured Bicone beads are slightly different shapes and sizes and I've made a simple Sterling Silver chain (will be available in my shop or email me if would like to buy). The stretch thread Ive used is a green colour (0.8) and attached via the chain links. I've used the same knot as I use for stretch bracelets ie surgeons knot. Although the thread is not particularly visible - I like the glimpse of green at the link connection. I've hidden the knot inside the first bead and added a tiny spot of glue to keep in place.


I like the final item and will wear it all day to check how it works for me. I hope you are inspired to make one for yourself or as a gift.

Thanks for reading.

Wednesday 19 November 2014

12 Days of Christmas Jewels - Day 7


Hi Everyone
Today, it's day 7 of 12 Days of Jewellery @ thepapersac and the item of the day is a Bicone Stretch Bracelet.


You can find the technique for making these beads in the 17/11/14 post.

I have used 20 individual beads for my bracelet. I've added a single red/gold mix bead in there - to add interest. The red bead is a different shape so acts as a bit of a focal bead. Even though this 'focal' bead is relatively small - I like the focus it gives.

I've also decided to use different sizes and shapes of Bicone beads, some have points and some are quite flat lentil shaped beads. I used the same technique for making all the beads but I like the variety that can be achieved with this simple technique. I've also made the threading holes in different place - this gives another option for changing the look of the final bracelet.

If you choose to use larger size beads, less beads will be required. To decide on how many beads you need, simply measure your wrist and keep trying on the item for size. Sometimes, the way in which beads are arranged make a difference to how the bracelet 'sits' on the wrist and how it moves. Keep trying on - to check you are happy with the bead sequence.The bracelet is very simple in terms of design and construction - it's predominantly made from Old Gold coloured Sculpey clay. I do think the colour gives a 'richness' to the piece but you could,of course,use any colour.

This would be a very easy gift item to make for Christmas. Hope you are inspired.

Thanks for reading.

Tuesday 18 November 2014

12 Days of Christmas Jewellery - Day 6


Hi Everyone
Today, it's day 6 of 12 Days of Jewellery @ thepapersac and the item of the day is a Bicone Drop Earring. Half way through the 12 days already !

I detailed the Bicone method yesterday, so look back for details of producing the Bicone bead if you want to make from scratch.

Day 6 is all about adapting the bead to a slightly different design (from yesterday). I've added a bit of bling via the gold and silver wires but also with an applied metal leaf and glitter clay. I added the metal leaf (gold) at the pre shaping stage and then made the beads as per the technique. The glitter clay (silver) was mixed as a Silver and Spanish Green and then shaped into the Bicones.


You could use any ear wires but I made these for the job. I will have some in my shop soon. Both wires are very similar in design and shape although the sterling silver version have a hammered 'stopper' and the gold version have a small loop. The loop allows extra Bicones to be added for extra glamour.

Hope you are inspired to make some of these earrings as gifts - so easy to make and they are lovely to wear. I'm looking for a green Christmas outfit to match !

Thanks for reading.

Monday 17 November 2014

Bicone Stud Earrings


Hi Everyone
We are in week 2 (already) of the '12 days of jewellery @ thepapersac'. This week it's the Bicone Bead series. My jewellery item of the day is a pair of Stud Bicone Earrings.


Making a bicone bead is a very simple and but surprisingly 'pleasing' technique. The first stage is to condition a small ball of clay and place it on a tile or hard surface. To form the shape, I use a small, clear acrylic plate, you could use a glass with a flat bottom. There is an advantage to seeing how the process is developing through the glass or plate.


The plate needs to move over the clay in a small circular motion. I find it best to go slowly and experiment with how much pressure is placed on the clay. As you make circular movements with the plate or glass, the clay begins to take on a Bicone or 'triangle' shape. If the shape does not happen immediately keep practicing with different size circular movements. You can make very small bicone beads or larger ones, the very small beads can be tricky to get a threading hole through the centre either from end to end or through the centre. Often, the shape is slightly compromised when you pass the hole tool through. I find it best to leave the shaped bicone bead clay to rest before making a hole. Also, it can be a good idea to use a couple of piercing tools to make the holes.


When the shape comes together, it's a very satisfying experience.

My first piece of jewellery in the Bicone Collection is a simple pair of stud earrings. I've used an Old Gold coloured clay but you could use any colour. I've shaped the bead using the technique described and then cut the bead down the centre. I've made the bead a little larger than my usual stud earrings, I think this makes the item a little more 'glamorous' - just right for a gift.


I've added a sterling silver post and produced a simple stud earring.

I hope you are inspired to make these earrings for yourself.

Thanks for reading.

Friday 14 November 2014

Star Drop Chain Necklace


Hi Everyone
Today, it's day 4 of 12 Days of Jewellery @ thepapersac and the item of the day is a Star Drop Chain Necklace.


I've been wearing the necklace for a few days (to check out durability) and I love it - it's definitely got bling ! I know the Star Beads are a small part of the necklace but they both shine and give a quick dash of red as I move. I used a gold chain this time. You could attach the the beads to any chain with big enough spaces to attach the jump rings. I think this one works well as the chain design allows a regular spaced point to attach the jump rings. I will have a few chains in the shop if you would like a similar chain to the one I the photo.

I used 16 of the smallest Star Beads (read back for details of how to make the beads) and as I've mentioned, attached them via jump rings. The necklace measures about 46cm which has turned out a good length for me. I used gold and red as my colours but you could use any colours and sizes of a bead. I'm also convinced I can change the beads to co ordinate with Christmas outfits for all the events I will be going to (possibly). I often find myself creating a specific necklace for a particular outfit and never wear it again. I feel, I can adapt this necklace design for that special occasion - I particularly like this idea.

That's it for the 4 Star Bead designs. Here is a round up of the Star Bead items this week.


Next week I will move onto the bicone bead designs and suggest another 4 items.

Have a great weekend, thanks for reading.

Thursday 13 November 2014

Star Stretch Bracelet


Hi Everyone
Today, it's day 3 of 12 Days of Jewellery @ thepapersac and the item of the day is a Star Bracelet.


The bracelet is made up with 18 large sized Star Beads ( look back in the series for details of how to make) and 18 tiny seed beads, the seed beads act like a spacer which allows the Star Beads to lie flat on the arm. I've threaded the beads onto a clear elastic 0.8 mm stretch thread. I've also finished off the knot with a sterling silver crimp cover bead. The beads have been sealed and lightly buffed giving a slight shiny finish.

This bracelet is a very easy make and could be made in lots of colour and/or bead size combinations. I think the star shape works well as a Christmas bracelet and the single colour is subtle 'nod' to bling. The tiny silver element adds to the bling and gives a touch of sophistication. This bracelet will co ordinate with any of the earrings in the series, so you could make a more elaborate gift by combining little projects. I hope you are inspired to have a go.

Thanks for reading

Wednesday 12 November 2014

Star Dangle Earrings


Hi Everyone
It's day 2 of the '12 days of jewellery @ thepapersac'. Today, it's the Star Bead again but this time I'm using a few dangle style earring hooks with the beads as well as a hoop style. Look back to day 1 for notes on how to make the Star Beads.
I've made a few different shaped hooks for the earrings and a couple of the designs use an interchangeable bead idea to allow the hooks to be used with different colours and/or bead combinations.
Here are the earrings :


Each pair of earrings allows the use of all the Star Bead sizes and colours but I've used the smaller versions here. Number 1 and 2 use a gold wire and 3 and 4 use sterling silver. Number 1 and 3 will allow several beads as well as a single bead to be changed without the use of pliers, literally slipped on/off. I like this idea as different colours can be chosen to compliment an outfit or change a style.
I will be stocking the various ear wires in my shops but these Star Bead designs can be used with any bought hooks. I will share how I make wires in another tutorial series after Christmas.
I hope you like the variations and feel inspired to make some of these earrings as Christmas gifts or for yourself.

Thanks for reading.

Tuesday 11 November 2014

Star Stud Earrings


Hi Everyone
Today, I'm getting into the core bead development of my 12 Days of Jewellery Project. As promised, all the beads are very simple to make. I used Premo Sculpey to make all the beads. Look back to yesterday's post for specific colours.

My first bead is a little star shape and my first item is Star Stud Earrings.


I made the star shape using a punch cutter. Making a clean, crisp star shape with this very small cutter can be tricky. Sometimes, the points of the star stick in the punch and occasionally the star is domed as its pushed out of the cutter. The Sculpey clay can get a bit sticky too, after handling. If I sense this happening, I will let the clay rest and it firms up well after about 10 mins.


Here is a look at the tools I've used and the tiny amount of clay required for this project.


I started with a small ball of conditioned clay and simple squashed it flat with my thumb. I cut of a single star in this photo but after I've completed my prototype I will make a batch of about 10 per colour. I don't tend to make any more than that because I want each item to be a unique piece. I will certainly alter sizes and clay colours as well as surface designs and embellishments.


I have some tiny sterling silver posts which I always place in the uncooked clay before baking. I've had problems with rebaking when posts are added to hardened baked clay - mostly the clay will crack and the bead splits.

The post will need to be 'bedded in' with clay and re baked - I will also glue in the post to keep the posts in place until baked. These posts have a little end stick which works well to anchor the posts into the tiny stars.


I make an even smaller ball of clay and place it over the post. The scrap of paper (with the hole) helps to push down the clay.


When the clay has been smoothed and blended into the back of the bead, the entire post is embedded in the earring. I like the neat, simple effect this gives.


This tile shows four sample earrings. I've changed each one slightly and added a few crystals to the gold version. Each earring needs to have the posts embedded and the whole thing rebaked.


I hope you are inspired to make some Star Stud earrings for Christmas gifts. After the 12 Days Project I will share my gift wrap ideas for my gifts. Look out tomorrow for the next item.

Thanks for reading.


Monday 10 November 2014

12 Days of Christmas Jewellery


Hi Everyone
Today, is the first day of a new idea for the blog. I'm going to introduce twelve pieces of jewellery which will be Christmas presents for friends and family or maybe for me !
I've taken 4 different bead designs and will make up the 12 designs using combinations of the beads. Some of the designs require a very basic level of skill and some are a little more challenging.
I thought, I would start the little series with the core beads and the clay I used to make them. Part of the series will include a gift wrapping idea - so you will have a complete hand created set of gifts by the end.
Here are the core beads in a selection of colours :


My starting point was to decide on colours and I've chosen the traditional Christmas colours of gold,silver, red and green. However, all the clay colours have been mixed in some way (with each other). You will need 4/5 different clays. I used Premo Sculpey brand for this project.


Combinations of my basic beads will form jewellery presents - either earrings, bracelet or necklace in various colours. Some of my presents will go to friends of friends, so I wanted each gift to be a little different from the next (in some way). The difference may be small eg a colour or a size. I've also taken into account that many people have very little time to spend on big creative projects at Christmas time so all options will be quick to make.

So far, I've produced my core beads and will aim to produce all the jewellery items over a few days. I will give an estimate preparation time for each item based on my own experience this week. The core batch of beads took me about 90 mins to make form start to finish plus baking time of 30 mins. I suggest making the core bead batch to both save time and allow for creative combinations as you construct the jewellery.
One 56gm bar of polymer clay in each colour is needed to make the core bead batch - I have clay left over and the clay cost me less than £10. If you search around Ebay there are lots of bargains to be had.

Tomorrow, I will go into detail about making all the core beads and the first jewellery item which will be a simple star stud earring. I hope you will be inspired to make along with me.

Thanks for reading.

Friday 7 November 2014

What is a good name for a chain ?


Hi Everyone
Planning for the '12 days of jewellery' went OK yesterday. I created a few beads and found myself 'all tied up' with an idea which has been resolved (sort of). I like my initial idea of a star bead. Making holes in the said beads (in the way I wanted) didn't quite work ! ............
So, it's back to thinking of another way. If, I'm honest, I like these little problems ! Hopefully by the end of the day, I will have a better solution.

Other news - I'm also quite excited about making chains. Ive been wearing the chain I made yesterday all day today and I love it. I'm going to design another chain which will do a similar job. In the meantime, I need to start naming my chains. Another job for today.


Thanks for reading.

Thursday 6 November 2014

12 Days of Christmas Jewellery Projects


Hi Everyone
Almost functioning today - the head cold is disappearing slowly and I'm feeling more energised ! I think ?

Today, my focus is a range of Christmas jewellery to make yourself. I don't like preparing too early or even mentioning the 'C' word before November - we are in November so OK on that one !

My idea is to design 4 simple projects to include stud earrings,drop earrings,bracelet and necklace. Each project will use different focal beads to add up to 12 individual items. Hope you follow that ? After the first set of designs you will find the individual items very easy to produce and should allow time for making larger numbers (if you choose to make gifts for lots of friends and family). I always make a batch of jewellery gifts in this way for people who help and support me throughout the year. Often such gifts are very simple and inexpensive but hand crafted. My recipients always mention how much they appreciate this kind of gift. I like to make little gift pockets to gift wrap. So, as usual, I'm including with my 12 days of Christmas Prep @ thepapersac projects. This will start in a few weeks and hopefully link with the jewellery projects.

Starting next Monday, I will provide a project each day. I hope it's enough time to make the items for yourself or for Christmas gifts. I'm using ideas which don't need too many tools or technical skills. I think, I'm going for traditional green and red colours using a bit of gold and silver. The basic designs will be adaptable so you could use any colours. I make most of my own findings so will include some details about how I do, what I do. The techniques I use are very simple and I aim to keep designs simple too. Hopefully my '12 days of jewellery gift prep.' will be accessible for everyone.

Yesterday, I did a little experimentation with the 12 days ideas. Here is a peak of what I came up with :


Thanks for reading.

Wednesday 5 November 2014

Workshop Beads


Hi Everyone
Another day and my head cold is slightly better .... but not much !! One of the boys has gone down too. He has taken to his bed !

Yesterday's polymer clay workshop created some lovely beads. Here is a few images :


This is a small selection of the lovely work produced. The girls have really developed their skills and ideas. Everyone is also enthusiastic about 'being creative with colours and ideas. I think our next move, as a group, is to start producing items for sale. Central to our workshops is fundraising to support a botanical project in the grounds of our local High School.

I mentioned yesterday, a new necklace Ive developed using a new chain design. I used the necklace to introduce bicone bead development at the workshop. The chain is lovely to wear and Ive already had positive comments about the necklace last night at another event. I'm already planning new designs using the chain.


Ive decided to keep this one for myself !


Thanks for reading.

Tuesday 4 November 2014

Making Beads


Hi Everyone
I'm still struggling with my head cold - yesterday was a bit of a difficult day and I spent most of it in bed. My plans for tackling my rather chaotic house post holidays didn't happen ! So big mess even bigger.

Today, it's our polymer clay class and we are on Workshop 4 of the series. I really enjoy these little classes and am looking forward to seeing what people come up with. Ive developed a few pieces with specific techniques in mind and have moved on my thinking re fastenings. Fastenings are always a problem for me. I like the simple approach and often abandon designs because I can't find a suitable fastening. Ive, specifically, been working on magnet clasps. I'm not there yet but I'm hoping I find a technique which I'm happy with. Ive also been working on a chain design, this is more successful. I do like it and I'm hoping it will work as one of my regular necklace chains. I'm going to wear it for a few days to check how it looks and works for me. Photos will be taken today and I will share tomorrow.
Here is a peak of the workshop e-poster for today's class. The class will focus on specific bead designs prompted by particular techniques. I will take some images of the work we produce and share them later this week.


Thanks for reading.

Monday 3 November 2014

Whitby Finds


Hi Everyone
We are back home after a lovely time in Whitby last week. Ive managed to acquire a bad head cold and I'm feeling rather unwell ! Ive got mountains of washing to organise and a house full of stuff which needs putting away. However, I'm going to take life easy ... so the house and the washing will need to wait.
I was rather disappointed with the internet connection issues I had last week. I had some great photos to share and the moments have passed ! We do tend to spend our holidays in remote(ish) places but I'm still amazed at how difficult internet access can be, despite several devices which should work everywhere and anywhere !!
However, internet issues have disappeared and here we are - back with technology at the touch of a button. A few days ago, I mentioned finding examples of Jet in the Whitby Museum and I wanted to share some images. However, there was no photography in the museum so I'm acquiring a book on the subject. Not too much to report about Jet at the moment. Watch this space.
While in Whitby, I usually find something interesting to buy. This time I found a few objects. Ive got plans to use each item in some way. Here they are :


I'm going to use the marbles for making large beads. I have a plan to create some hollow beads using the marbles. I found a technique which I have high hopes for ! I will share my experiments.
The spoons are plated silver and have rather 'unpleasant' additions on the handles. I do like the shaft designs and the shape of the spoon parts. I'm going to try and improve the end of the handle by decorating it with polymer clay. I'm not sure exactly what the design will be at the moment, I'm still working on plans.
The third 'find' in my bag is the pieces of Jet. I'm thrilled with the Jet. Again, I'm not sure exactly what will happen with the Jet. I need to do lots of research.

Thanks for reading.