Search This Blog

Popular Posts

Friday 31 January 2020

Knitting News

Hi Everyone 
I spent a lovely couple of hours a few weeks ago at my local yarn shop, Fine Fettle Fibres, enjoying squishing and marvelling yarn at a Trunk Show from Old Maiden Aunt . The pop up shop had so many lovely yarns, I struggled to decide on something in particular (rather than everything) on display. I could have bought the whole lot. However, I have so much yarn in my stash I did need to exercise discipline. 
In the end, I managed to come away with a skein of beautiful baby alpaca/silk/cashmere 4 ply in the far daring colourway. The colour is lovely but the feel of the skein is something else, extraordinarily luxurious ! On the day, I also purchased a shawl pattern by my lovely friend, Stella Ackroyd. Stella had knitted up this design in a similar coloured yarn (from Old Maiden Aunt) and the sample kept drawing me in. 


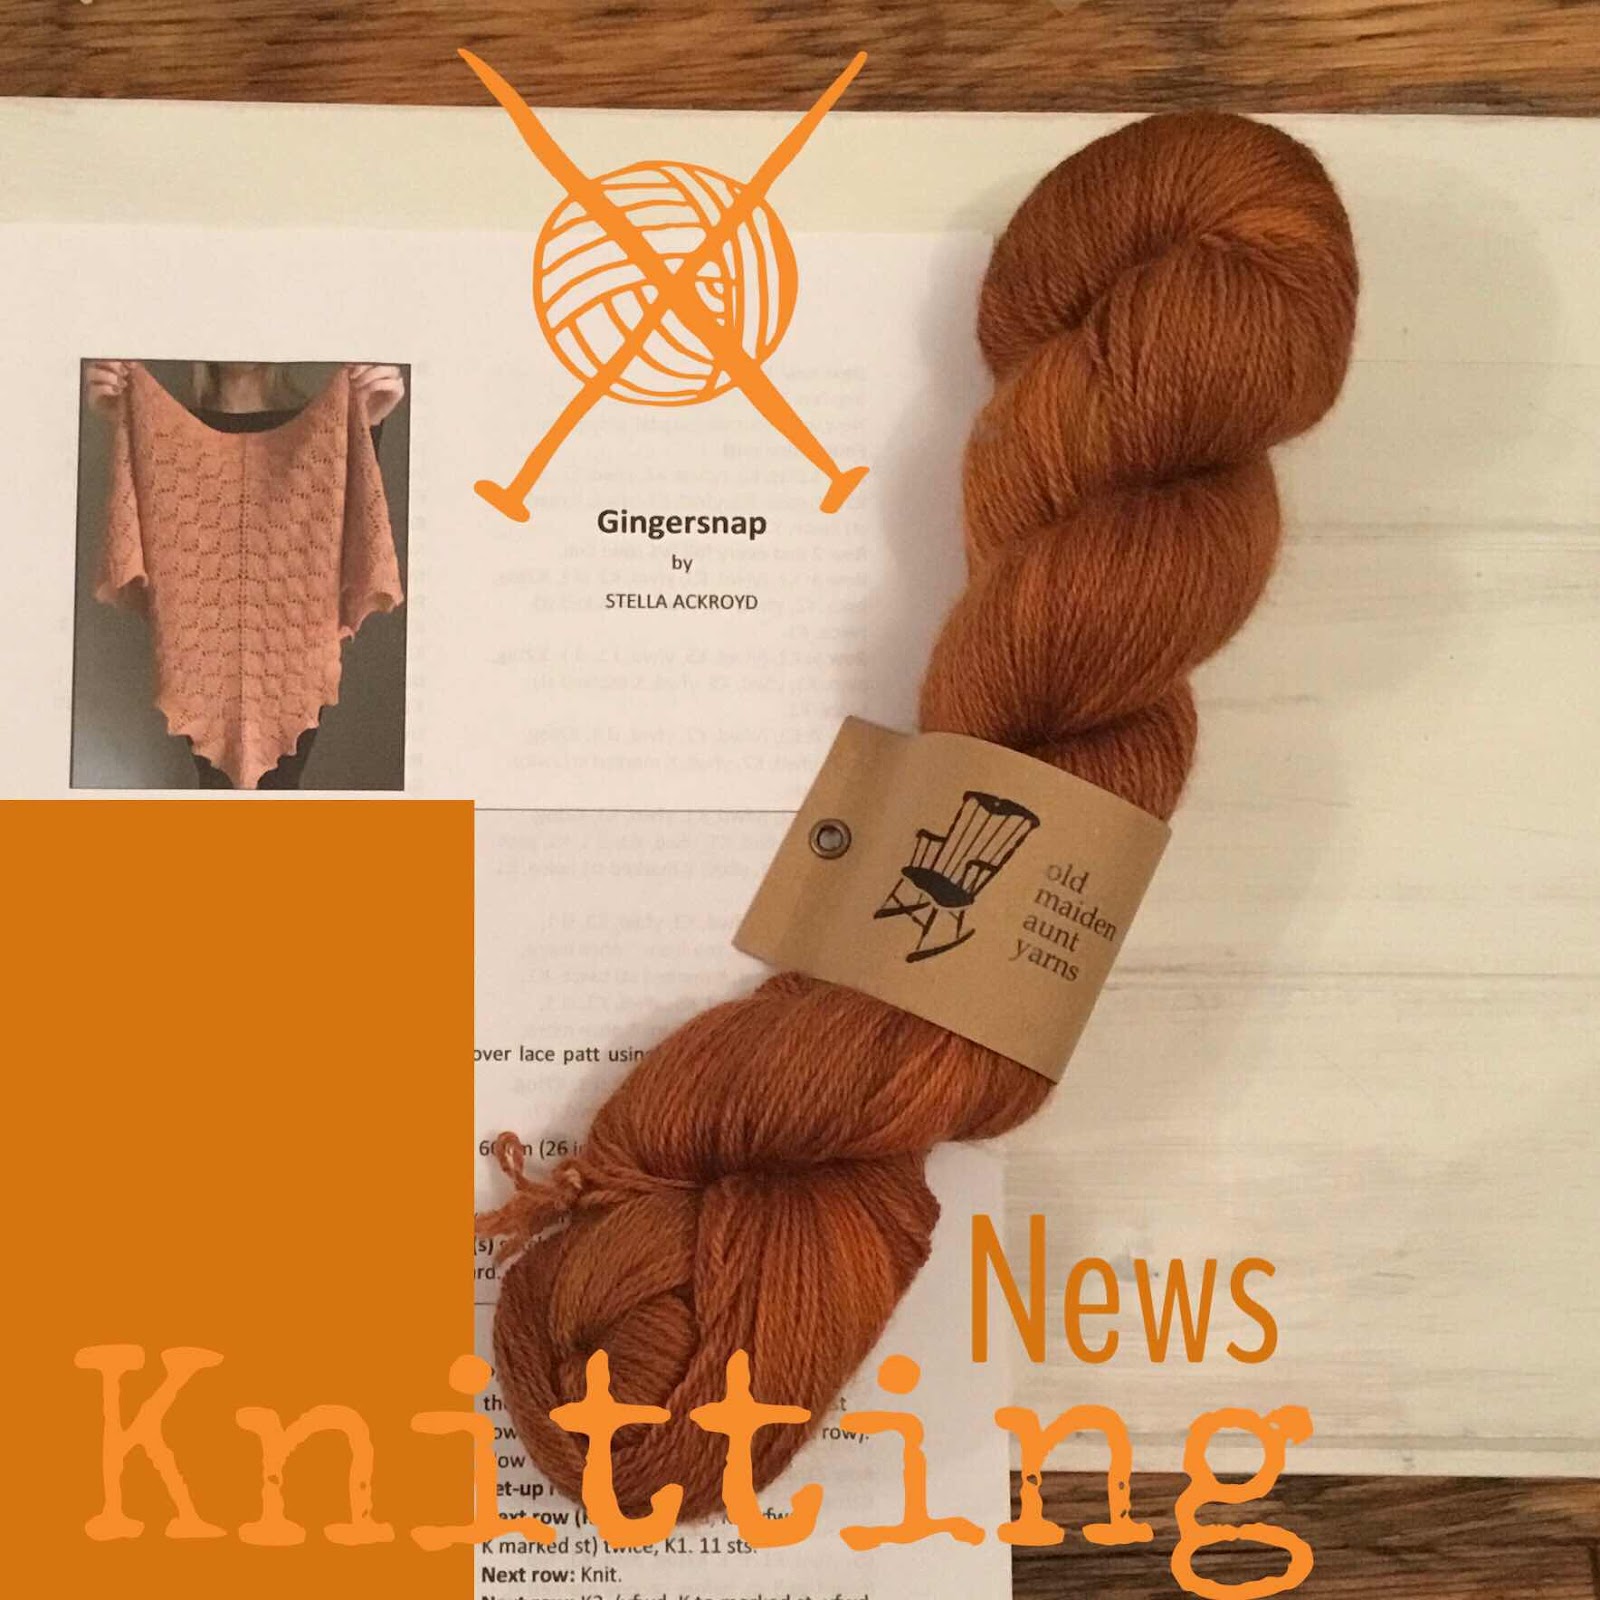
Knitting the shawl will be a challenge for me. It’s an overall lace shawl and I always struggle with lace patterns. Hopefully, this project will help me to be disciplined in following a the pattern. I’m hoping I can cast on later today. I think, I need to knit my Gingersnap during the day. I’m planning on putting aside a short time each day or every other day (during the day) to knit my shawl. I tend to knit at night, watching TV and lace knitting (for me) needs to be something I concentrate on, following the pattern will need my full attention.
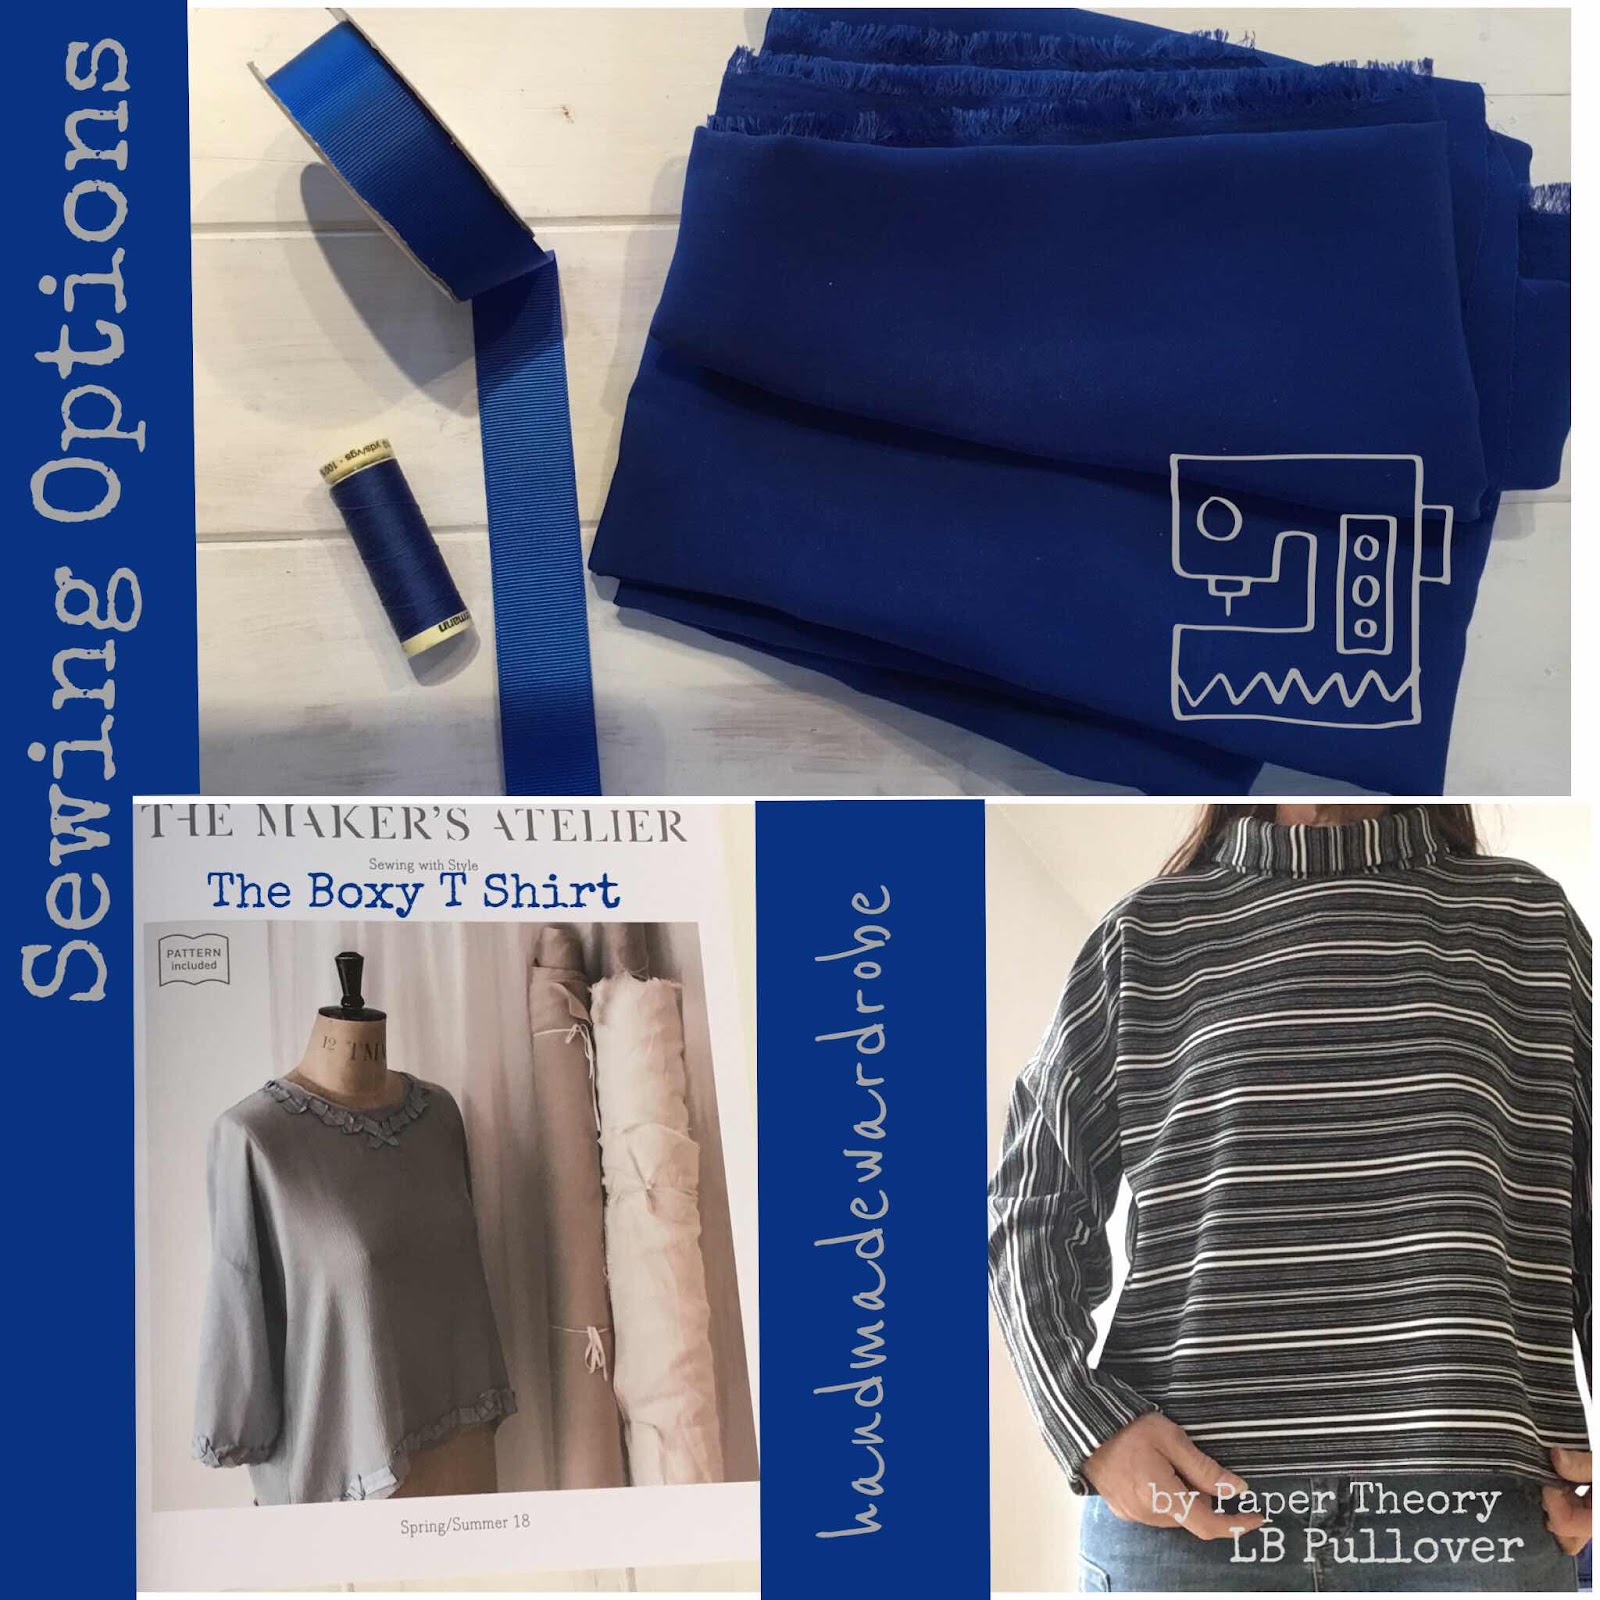
I’ve finished my current sweater knit, the tarasgeir sweater - you can check out the details here. I do need to block the sweater but it’s time to plan the next one. Very exciting ! I’m hoping to organise my next sweater, later today. I’ll let you know what I decide to do - on Monday. I’ll also get some finished tarasgeir photos when the sweater has been blocked but I do love the design, already.

Have a great weekend. I’ll be back on Monday with more Making stories.


Thursday 30 January 2020

Silver Sample

Hi Everyone 
This weeks Silver Sample is a pair of earrings. I’m calling the design Circulus.


These earrings are very simple and easy to wear. I’ve used 1mm Sterling Silver wire for this pair, my design drawings came up with three different sizes and I’ve chosen to make the medium (M) version to start the prototype. I’m happy with the size. The shaping is a little more tricky than it may first appear, which took me by surprise! The length of the ‘legs’ (in proportion to the circle) is quite important to balance the earring. One leg is slightly shorter than the other. The back leg needs to be longer. I’ve chosen to flatten the legs (after lots of indecision) and I’m happy with the final design. I still need to polish the earrings but I like them. 
I struggled to get a photo of the earrings in action, they move around (slightly) and tend to be almost invisible in some ‘full on’ frontal views ! However, you get the idea and my photo, bottom left, gives an idea of the shape in the ear.
Thinking about the other size earrings, in my drawing plans, I’m not sure if the small size will work ? My plans have chosen the same leg length with a smaller hoop. I think, I need to rethink the length of the legs ? I did draw out the earring plans in actual size and they looked ok but having made the M size, I think I need to shorten the legs. I would like to try out a smaller earring, my everyday choice is always - small. I’ll share the results of more experiments, next week. I also have an idea for a necklace charm using the same idea, so that may appear too !
Thanks for calling in today.


Wednesday 29 January 2020

Knitting News

Hi Everyone 
I’ve almost finished my latest sweater knit, tarasgeir by Flora Kennedy. The sweater looks great and it’s been quite an easy knit. I have changed quite a few parts of the pattern. I wanted a less fitted sleeve and have changed the top of the sleeve to give a dropped shape (at the shoulder). This change resulted in changes in the way I knitted the whole sleeve, so I’m hoping it’s going to look as I’d hoped. I have tried on the sweater at various stages but it’s never quite like the finished garment fit, until everything has been done. I’ve also altered the length, very slightly. The sweater pattern is cropped and I added a few centimetres as well as widened the bottom by adding more cast on stitches. The sweater is knitted bottom up.


I need to sew up the sides of the sweater and sleeves, I’ve pinned them together for now. My aim was to have a sweater which would be good for layering over dresses and t-shirts, so I wanted a more boxy shape, hopefully, that’s what I have !
I’ve used Wensleydale Longwool to knit my sweater, it’s lovely to knit and I’m interested to see how it blockout. My plan is to try on the sweater, use
Mattress Stitch to sew up the sides and block, I’ll let you know how things go.


Thanks for calling in today.


Tuesday 28 January 2020

Sewing Options

Hi Everyone 
As I mentioned yesterday, I have another new sewing project in the planning. I have a number of options, in my mind.


I had, more or less, decided on the specific design. However, I have some doubts and keep wondering if my trusted LB Pullover would work better (bottom right image). The initial idea for my project is The Boxy T Shirt by Makers Atelier. I especially like a version which adds a ribbon trim (see my image, bottom left). I love the ribbon trim but also the raised front line of the T Shirt and the wide cutting of the cuff. However, I know, the LB Pullover is such a great fit for me and I’ve been wondering if it’s a safer choice ? I could also add the ribbon to the LB, so it’s a difficult one ! I’ll read about and ponder the details of the Makers Atelier and make my decision before the end of the day. 
My fabric is a pretty bright blue colour and quite a lightweight, drapey, woven fabric. It’s rather silk-like but probably a polyester or maybe a viscose ? I’m not sure when or where I bought the fabric ? I probably bought it around the time I received the Makers Atelier magazine (Spring/Summer 18) but I’ve no idea where it came from. 
The magazine goes into several versions of the TShirt pattern, giving a range of different looks. I would love any of them. My only issue is the fit. This project is such an easy, quick sewing project and I should stop procrastinating and just get on with it ! I have lots of fabric and can make several versions of both patterns. I think, I’m talking myself into the Makers Atelier choice. I’ll let you know tomorrow.
Just a note about the Makers Atelier Magazine, it’s a beautiful publication. Lots of interesting articles and each magazine contains a pattern. Check out Makers Atelier stuff here, everything they do is very stylish. The photography in the magazine is exquisite and such a joy to browse, especially inspirational.

Thanks for calling in today.


Monday 27 January 2020

Sewing Stories

Hi Everyone 
I’m on my regular mission to organise and store my Making stuff and have come across a few little sewing projects which have been (almost) forgotten about. I had started an Ogden Cami top, by True Bias patterns, quite some time ago. I can’t quite remember the date but it can be counted in years rather than months. I’m not quite sure why the top has not been completed ? I’ve done most of the work. Technically, there’s only the hem and the straps to sew. I could probably have finished the job in an hour or so. 
I’ve spent some time closely inspecting the Cami and decided to work on the top edge of the garment and it’s much improved. The fabric is a silk polyester jersey-like material and quite tricky to sew. There’s lots of stretch but it’s also very slippy. The top line of cami it self interfaced (with the same fabric) and in parts, quite bulky. Yesterday, I trimmed and graded the layers and it’s much improved. Hopefully, I can find some time to complete my Cami  today. 


In addition to the Ogden Cami, I came across another project waiting to be started - this time it’s just a plan plus the pattern and materials ! Hopefully, as soon as the Ogden Cami has been finished, I’ll start the next project. It will be a blue T shirt using woven fabric and embellished with ribbon. Again, this is something that’s been waiting a very long time to make. I’ll share the details of this new project ‘to be’, tomorrow.

Thanks for calling in today.


Friday 24 January 2020

House Sewing

Hi Everyone 
I’m sharing a little project for my newly decorated (only downstairs to date) house today. I’m not completely finished decorating but it’s time to start with the final soft furnishing bit (downstairs). I’m much more enthusiastic about this part of the process. Painting walls and woodwork is not exactly my favourite thing ! However, I’m very happy about the results and the difference in the house. I have upstairs to tackle but I want downstairs to be completed, first.
So, back to my Make for today. It’s a large cushion cover. 


I have lots of new cushion covers, some have been bought but I’m also making others. The large covers have been made from a throw which I already had. I’ve purchased some pompom trim in a soft grey colour and it’s a great contrast with the ginger shades of the throw. I love the result. I have one more cushion to sew up, using the same fabric. I’ve prepped the second cushion and it’s ready to go. Each edge of the fabric has been sewn with my Overlocker, to seal the fabric first. Sewing the trim in place is slightly tricky, I wanted the little pom-poms to be visible without the actual tape showing on the edge of the cover. I’ve probably over prepared by basting each stage in place and sewing each edge separately. It’s very easy to catch the pom-poms as they are sandwiched between the fabric pieces. I’m checking and removing any sections which are not perfect. I’ve only needed to resew a very small section - all is well.

Thanks for calling in today.
 Have a great weekend. I’ll be back on Monday with more Making stories.


Thursday 23 January 2020

Silver Sample

Hi Everyone 
I have a new Silver Sample to share today, this time it’s a ring. I was inspired to make this ring by a Pinterest image and it’s been in my head for quite some time. I experienced a few issues with my solder points but eventually, I worked it out.


I used a combination of 3mm and 2 mm Sterling Silver wire for my ring. The main part of the band is 3mm wire and the two top rings use 2mm wire. I love the result. The ring is comfortable to wear and sits nicely on my middle finger. It’s a statement piece and not for everyone but I like big rings and I’m going to enjoy wearing this one. I just need to polish my ring and am hoping to do this, later today.
Although, the ring looks very simple, I needed to shape the band to accommodate the placing of the two separate rings on my finger. The rings are different sizes and I wanted the smaller ring to sit on the top of my finger. It took quite a few attempts to shape all the elements in order to balance the design. I didn’t want the ring slipping around my ringer, often an issue with big rings. Hopefully, the positioning of the top ring components will keep the whole piece in place - as I go about my business.

Thanks for calling in today.


Wednesday 22 January 2020

Room Art

Hi Everyone 
I’ve been spending a little bit of time printing with my Gelli plates. I’ve had a lovely few hours, just messing about with paint. It’s a very long time since Ive done this and I’m definitely going to keep going - so uplifting with a little bit of frustration mixed in ! The inspiration for starting my experiments with paint (last week) was a need for some new bits of Art for my newly painted lounge. I hesitate to use the term Art, it sounds rather pretentious. However, I’m hoping I can use my Art prints to pull together new colours and textures in the room. The term Room Art is perhaps more appropriate ? My view is that I can’t buy what I need so I’m Making it. I’m using the prints to bring a little interest to the walls and will keep changing them until they work in the room. I’m not precious about the prints, if they work in terms of colours and textures, they will stay for a while. 
Here’s a quick look at the first batch of prints before going into their frames :


I’ve used acrylic paints, printing blocks and stencil masks in the prints. I have another batch of prints underway - I’m going to brighten up the colour range, more yellows and oranges. My aim is to create lots of layers, developing depth and bringing a ‘light and dark’ thing to the images. 
I have a number of traditional frames to fill but I also have a few large canvases. I have an idea to create an abstract street of houses using my prints ? This may or may not work - hopefully, I’ll know by the end of the week. I’m not totally sure how a I will do this but I’m keen to test out some ideas.  I’ll share the final pieces when a I have them. This house idea cam from a recent Gelliarts video blog post, it’s a fabulous idea and I’ll be creating some of the individual houses for another wall feature, check out the video Gelliarts video here. I’ll be using my own colour palette but the plan is the same.

Thanks for calling in today.

Tuesday 21 January 2020

Sewing Project

Hi Everyone 
I have a new sewing project - a pair of jeans. I’m making a second pair of Morgan Jeans by Closet Case. This time, I have some lovely green denim from Merchant&Mills.


My denim was a Christmas gift but I’ve yet to get started with my jeans, it’s less than a month (just) but I still feel I need to get going with my jeans. I need to wash the denim today and that will get me underway. I’ll be able to find some lining fabric for the pockets and waistband from stash but will need acquire a suitable zip and I’ll be ready to start. 

My previous Morgan Jeans and the pattern use metal buttons for the fly but Closet Case do a great tutorial on the zip method and I’m keen to give that a go. The denim fabric is a lovely deep green colour and will be something different for my handmade wardrobe. 

My first jeans are a good fit so I’m reasonably confident this next pair will be OK too. Although, making jeans seems to be a tricky thing to make, I think it’s quite straightforward (famous last words) ! and very satisfying. The only intimidating bit for me is the fit rather than the construction approach, in particular, at the waist. Last time, after cutting out the fabric pieces, I basted all the upper waist/hip bits together for the fitting and this solved all fitting issues. Basting is a temporary straight stitch used to hold layers together, as it’s a long and loose stitch - it is easily removed after the final stitching is in place. If the fitting is not good, individual pieces can be altered. It’s possible to recut as well as decide on a new seam line for each of the pieces. Closet Case have lots of brilliant tutorials on their website to help with making and fitting jeans, check out all the tutorials here.

I’ll share progress with my jeans as I have something to show, here on the blog. In particular, I’m hoping to talk about the fitting and any alterations I make
Thanks for calling in today.

Monday 20 January 2020

Jewellery Inspiration

Hi Everyone 
Today, I’m sharing a great book I was given as a Christmas gift. I’ve not had time to test out any of the ideas yet, today is the day I’m planning to choose the first one. I’ve been attracted to stonesetting for as long as I’ve been making jewellery but my stone setting projects have been rather limited,so far. I’ve developed a range of basic bezels and have made a few Claw settings but don’t have the skills or knowledge to achieve much more. 
This book, StoneSetting by Melissa Hunt, is amazing and I’m looking forward to trying out all of the techniques and suggested projects in the book. The book also details the types of stones available with detailed descriptions and characteristics of a wide range of stones. 


I particularly like all the samples on the cover of the book but my current favourite is a Tension Set stone in a simple Sterling Silver band (ring). Sometime soon, I’ll develop my version of this ring. I need to find a suitable stone for the job.
I especially like Citrine(yellow) and Peridot(green) stones, probably because of the colours. I have a very small Citrine in my collection and this week, I’m going to work on a bezel for this stone, to add to a ring. I should have something to share in my Silver Sample, later in the week.

Thanks for calling in today.


Friday 17 January 2020

Sewing News

Hi Everyone 
I have a tiny bit of sewing news today. A new pair of pyjamas under construction, I’ve made some bottoms and have been waiting for more fabric to be delivered to make the top. My fabric is leftover stuff from previous nightwear projects and I did think I may have enough to make the top. However, there was absolutely no fabric left. I managed to patch a couple of fabric designs together for the bottoms. I like the look of the two different colours together and have ordered exactly the same designs again to complete the pyjama top.


My fabric comes from Minerva Crafts (a regular favourite place to shop for fabric) and I seem to have bought the last bits in my chosen designs ! There are lots of other colours/designs in the same cotton fabric and at a very reasonable price - check out their offers.
I’m using my regular pyjama pattern for the basis of my set. This is the Butterick B5792 pattern, a very simple pattern which allows for lots of options re trims and slight changes. I’ve made several different nightwear sets, all with slightly different necks, arms and trim options. 
My pyjama bottoms have an added contrast hem on the legs as well as me made bias binding trim at the waist. This trim is simply an embellishment and has been added after I’d completed the waist, it has no other purpose than to look pretty ! I love the look of the bottoms and will hopefully come up with something creative to compliment the set, when I get to the pyjama top.
I’m also considering a simple dressing gown if I have enough fabric left. My idea is to develop an oversized, simple wrap over garment - perhaps thigh length ? - the amount of fabric will determine how long ! Hopefully, I can spend some time over the weekend working on my nightwear set.

Thanks for calling in today. Have a great weekend and I’ll be back next week with more of my daily Making stories.


Thursday 16 January 2020

Silver Sample (16/1/20)

Hi Everyone 
My silver sample this week is another couple of Sterling silver bangles. This Make is a regular one, from my repertoire. I’ve produced a plain bangle which will get a semi precious stone charm made from 2mm round silver wire. The second bangle has three sterling silver tube beads and is made from 3mm sterling wire. I did consider decorating the tube beads with a simple surface pattern but decided I liked the simplicity of the beads, maybe next time !

             
I like wearing a couple of bangles together so will look at these two pieces as a single piece of jewellery. I’ve completed the construction part of the Make but need to polish the bangles. Hopefully, I’ll get this job completed later today. I’m hoping to add a Turquoise charm to the finer bangle, I’ve already prepared the bead and casing for the charm. I’ll share the finished, polished piece next week.

Thanks for calling in today.


Wednesday 15 January 2020

New Knit Project

Hi Everyone 
I have a new sweater project underway. This knit is called the tarasgeir by Flora Kennedy in collaboration with Uistwool. I’m using Wensleydale Longwool yarn in shade 401 which is a beautiful natural white colour.


The sweater is knitted flat and is simple in style. The bottom hem and sections of the sleeves have a short lace section and the sleeves are ribbed for around a half of the length. I love the design and originally saw the design knitted up at Edinburgh Yarn Festival last year. It’s a design that’s been on my to knit list ever since.
Although, I did intend to knit the pattern as written, I seem to have gone off on my own journey. This is not unusual for me. I do have a compelling reason for changing things but I’m still wondering if I’ve done the right thing. I’m sure a more sensible approach would be to knit the sweater as per the pattern and then knit a second with my own alterations. However, that said, I’ve changed the fit of the sleeves. I’ve done this because, I think, I’d like to wear the sweater as a layering garment and don’t want a fitted sleeve. My alteration involves a dropped, straight sleeve fitting. My sleeve will be exactly the same half sleeve (from the cuff) with a wider, roomy shape at the underarm point down to the elbow. I’m hoping the sweater will remain balanced and work with my changes. I especially like the simple lace elements and the neck which a I will hope to retain. in addition, I’ve made a size larger than my body measurements, to allow for a boxy, cropped shape.
I’m using a beautiful yarn called Wensleydale Longwool. The yarn is lovely to knit and has a wonderful lustre. The colour is a cream shade and works very well for this pattern. This is the first time I’ve used this yarn and I’m already thinking about using the yarn for another sweater.
I’m making good progress with this project and have almost completed the back. My usual approach is to knit in the round and I tend to shy away from flat knitting in separate pieces but I’m quite enjoying this knit. I have slight anxieties about sewing up seams in a neat fashion ! 
I’m still using a flexible needle which fits my style of knitting, so it’s a comfortable knit. My plan is to complete the back and knit the front, I’ll then attach at the shoulders. I’ll knit the sleeves and attach both to the shoulder seams. I’ll then stitch the sides and sleeve in one seam. The neckline will be the last job. If all works out as planned, my sweater will be ready to wear. Fingers crossed.

Thanks for calling in today.


Tuesday 14 January 2020

IKEA Hack

Hi Everyone 
Today’s Make is an unusual one for the blog. I’m sharing the latest in our house Makes. There is always a need for more storage and this very simple IKEA hack has created much needed storage for sewing related things. Sewing has a very important position in our house and as such gets lots of time and attention for storage opportunities. Sewing happens in the centre of the house rather than being hidden away in a spare room so it’s important that storage is specific and easy to use. I’ve been looking for some kind of storage for a (small) space for quite some time. I wasn’t especially looking for a new piece of furniture but I came across an idea for changing a rather uninteresting set of drawers called RAST from IKEA. You can check out the original piece here - pre hack.

            
The little set of drawers has been given a simple makeover, there are three separate drawers but our RAST has the illusion of six drawers by adding a groove along the width of the drawer front. Different handles have been added and the pine finish has been given a Dark Oak stain. The bottom edge has been lined up with the rest of the drawers and that’s about it. I’m going to give the piece a wax today and am hoping this will add a little something to the finished item.
Generally, I love the new storage. The top drawer is great for overlocker threads and there are another couple of drawers for more storage- yet to be decided.

Thanks for calling in today.


Monday 13 January 2020

Knitting News

Hi Everyone 
I have a new knitting project underway- another sock design. This time, I’m developing a toe up design with an afterthought heal. I’m using a traditional 4 ply sock yarn in blue for the majority of the sock. The cuff will use one of my own spun yarns in a sport weight. My socks will be called Blueberry Socks.


I have tested a cuff down version of the sock which didn’t quite work for me. The sport weight yarn required a relatively larger needle, initially I used 4.5mm, the transition to a 2.25mm needle (for the finer yarn) required a gradual decrease of stitches. Ultimately, the plan needed a rethink. I wanted to develop a finer sock foot but with a chunky look to the cuff. The finer foot part is important, in order to wear with regular shoes. My plan is to complete the foot part of the sock and play with different transitional arrangements for the cuff.
Things are working well at the moment. I’ll share progress as I find my solution to the process.

Thanks for calling in today.

Friday 10 January 2020

Silver Sample

Hi Everyone 
I have a Silver sample to share today. The sample is almost there, I need to shape the hoop part (which goes through the ear). I think, I’m going for something I call a Balloon hoop. You can see an example of this style here.


This new earring design is made up of three short pieces of sterling silver wire, stacked and attached to the ear hoop. It’s a very simple design but works well as a balanced weighted earring. I made the stacked component and soldered the stack to a balled/hammered long post. The post will now be shaped into the balloon. I’ll add a small transparent plug to keep the earring in place, I’ve had a few disasters when the earring has been lost, in the past. 

Thanks for calling in today. 
Have a great weekend. I’ll be back on Monday with more Making stories.


Thursday 9 January 2020

Blueberry Cowl

Hi Everyone 
I’m sharing a new completed knit today. This is a project that has been underway for a while and reworked several times. This is not unusual, for me ! I started with a crochet cowl project and completed the cowl, however, the finished item didn’t really work. All my crochet stitches merged into a very tightly worked fabric. There was very little definition of the pattern and wearing the cowl was uncomfortable. The finished fabric was solid and did not bend. Generally, it was unwearable. 
My final approach (after several attempts) was to find a knitting pattern which I liked. I’ve taken inspiration from a recent sweater project (check out the initial stages of the idea here).


I’ve renamed the cowl - the Blueberry Cowl. I’m using leftover yarn from my recent Woodbine Sweater - see the finished sweater here. I have designed a central column using a very simple lace with a few cables. The sides are stocking stitch. My cowl is great. The size is just right and it’s blue, my favourite colour. All is well !
Good news,  I have more of the memade yarn leftover from the Woodbine Sweater the Blueberry Cowl and have yet another knit underway. This time it’s socks. I’m using the memade yarn for a folded, chunky cuff and a much finer 4 ply for the foot part of the sock. I’ll share progress as it develops. I’m in the very first stages and have just completed the first cuff and started the foot.

Thanks for calling in today.


Wednesday 8 January 2020

New Nuuk

Hi Everyone 
I’ve finished my latest version of the wonderful Nuuk Sweater by Joanna Heitala. This is my fourth version of the design. You can check out my previous Nuuk sweaters here.
The latest Nuuk is in its second form. I’d used the same yarn (an old Merino yarn from way back - in my stash, held together with a Malabrigo Lace). The yarn is roughly a DK weight. I love the colour, it’s a vibrant lettuce green, the photo bottom right is probably near to the true colour.


My version 1of the Nuuk - see bottom right image, was slightly too small across the shoulders as a result of the gauge. I should have gone up a needle ? However, I’m not sure the long sleeves and longer body worked for me ? I like the more versatile layering options of the short sleeves sweater. I’ve also made the latest version wider and slightly cropped and it’s great. I’m much happier with the result.
I need to sew in the ends and it’s ready to wear.

Thanks for calling in today. I’ll be back tomorrow with another Making story.


Tuesday 7 January 2020

Sewing Plans

Hi Everyone 
Today, I’m sharing a new sewing project. This is one of my lovely Christmas gifts.


The fabric in my gift is a beautiful mustard coloured fabric in a double gauze from Merchant&Mills. I also have a contrasting rib in blue with a mustard, yellow and burgundy stripe, again from Merchant&Mills. My plan is to make the Fielder Dress, yet again by Merchant&Mills. I already owned the pattern and it’s been waiting for the right fabric to come along.
I’m not sure, if I will make a full length dress or go for a longish tunic ? Perhaps, the dress would be a more useful garment ? My hesitation is to do with how I will wear the garment. I envisage mostly wearing the Fielder with jeans or trousers. However, I do like a long tunic and a dress length would be more versatile. 
The Fielder is a very simple Make and I’m hoping to get things moving over the next few days. I’ll share my decisions and developments as they happen.

Thanks for calling in today.


Monday 6 January 2020

Happy New Year

Hi Everyone 
Happy New Year for 2020. We’ve had a lovely family Christmas holiday and I’m feeling quite refreshed ! I’ve got lots of new plans which I’m hoping will happen, only time will tell !
Ive had a lovely time, dabbling with little Making projects over the last couple of weeks and I’ve got one of them to share today. My first make of the holiday is a little knitted needle case.


The yarn is leftover stuff from my 2019 Advent Project (check out the project here). The inspiration for the little needle case came from a recent workshop, just before Christmas, led by the very talented Liz Reed. I had the most wonderful time, produced a knitted Angel (see it here) and was gifted a special little button from Liz. Check out her website here. Liz also provided her own knitted sewing needle cases for use in the workshop. I loved the idea of the little cases and was immediately inspired to make one of my own. So, my little case is a simple Garter Stitch shape with a memade felted insert for holding a selection of needles. I’ve added my little button to close up the case. I love it and it makes me smile each time I use it. Thank you to Liz for the idea and the button.

Thanks for calling in today.