Search This Blog

Popular Posts

Friday 22 May 2015

Knitting little things

Hi Everyone
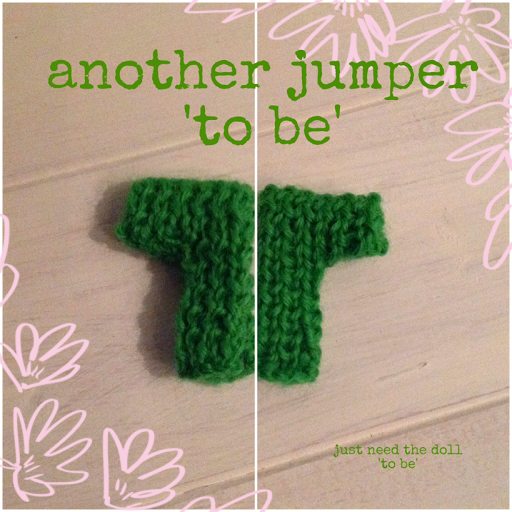
I'm sharing some very small knitted things today. If you look back a few weeks you will see some little felted dogs I've been making. I'm thrilled with my little guys and had an idea to make them some jumpers. Some of the dogs will take the jumpers but not all of them. The dogs which don't have jumpers will have scarfs and/or hats - no one will loose out ! I'm not so precious about the knitted item and I also have some little bits of leather which could turn into something interesting to wear ?
One of the items I've made is a little cardigan/coat  - it doesn't actually fit any of the dogs ! I need to make either another dog or a doll. I can't quite decide ? - Im swaying towards a doll at the moment but that could change. 
I don't have a pattern for the knitting, I just knit and go with it. At this point, I also need to say I'm not a great knitter in terms of skill but I'm getting better as I practice knitting the jumpers. The best part of knitting little things is they don't take too long and don't have lots of stitches. When I make a mistake I've no problem taking out and starting again. I'm definitely improving my quality - less jumpers being undone. I may even turn into a real knitter, one day !
Here's a look at some of the things in the Knitted Collection so far :


The knits need to be 'dressed' a little better but you get the idea. I've really enjoyed knitting these little items and will keep going with the dogs. Everything here needs a bit more work and there are plans for furniture too.

Have a great weekend. It's yet another holiday week next week. I will be posting a few photos stories along the way.

Thanks for reading

Thursday 21 May 2015

Imitation Game Starburst

Hi Everyone
I'm having yet more problems posting my blog from the (relatively) new app !! Can't believe it.

Anyway, having prepared and just about to publish  - the whole thing is crashing.
Great news all the same, I've started the new Imitation Game Collction called Starburst and have started some experiments. Will hopefully get back my app later, until then here is an image of the progress to date :


Well that's about it for now - having cobbled something together to share, I need to decide how to fix things.

Thanks for reading.


Wednesday 20 May 2015

Kits - The Paper Creaser

Hi Everyone
I'm starting a new post for Wednesday's today, slightly different from previous Wednesday's . The main idea is to highlight Making Framework Kits. The kits could be Tool Kits or Project Kits or even bits of kits. These kits are designed to run alongside workshops and/or Make and Take Sessions but will work well as stand alone and self directed projects.
My post today is all about the paper creaser, I love this tool. It's useful for lots of things and I use an old thing which I've had for years.


I must have had this tool for about 10 years, bits have been trimmed at the pointed end (a few times) but it still works well. I use the creaser mainly for creasing card when making greetings cards or boxes (from paper material) ; but I also find myself looking for it each time I cut any paper or card with a craft knife. Often a slight raised edge is created and the creaser easily makes this flatten out and gives the final cut line a very clean and neat finish. This sounds like a minor issue but the whole quality of the cut line makes the final product so much better.
The creasers offered in the Basic Paper Craft Tool kit are these :


The creases can also be purchased individually. Both styles are very similar in use. I think the style is a personal preference, I have used both these different shapes with the same success. If I was to choose the shorter version is my first choice, I think, because my original creaser is the same shape. 
All the Making Framework Paper Craft Kits will use this tool, for me, it's essential. Like my creaser, it will last for years - so it seems like a good investment too.
All the kits I will featureare will be available from 20/5/15 in my Etsy and Folksy Shops - there is a link on this blog page.


Thanks for reading.

Tuesday 19 May 2015

The Making Framework

Hi Everyone
Today's Making Framework has invited Bella Mitchell to write a review of her participation in one of the Making Framework Tuesday Workshops. These workshops happen twice each month (during term school term time) and introduce students to lots of different craft making projects. The projects are available as kits which can be bought independently but the workshops offer tuition and a chance to work alongside others, as well as giving opportunity to make friends.
Here is Bella's review :

Bella Mitchell Review
 Tuesday (11/5/15) Workshop Paper Making (2)

  ''I really enjoyed going to the workshop, I was a little apprehensive about signing up because I didn't think I would know anyone and I'm quite a shy person. 
As I arrived, I was met by Gill, the workshop facilitator and our tutor for the session. She needed some help organising the furniture in the room and I volunteered. This little job helped me to relax and get involved immediately. Shortly, the other members of the group arrived and Gill introduced me to them as they walked in. Everyone spoke to me and made sure I felt welcome.
We started the session with an explantation of what we hoped to achieve and we looked, in detail, at the workshop kit. Having organised the contents of the kit, the first task was to make an envelope. We followed step by step instruction and everyone completed the task at the same time. We then discussed the steps needed to make a card and a couple of tags. This part of the workshop was more about individual style and choices which I enjoyed.
At key points Gill would give tips and show specific techniques or suggest design ideas. This part of the session felt more relaxed and I lost myself in my own ideas. I was pleased with my efforts and felt I'd made the right decision to come to the workshop.
We all enjoyed a cup of coffee and continued chatting and working. I couldn't believe the time when Gill suggested we start to collect our things together to leave.
I had a great time. The whole session inspired me to go on and make more cards and tags. Gill took photos of all our 'makes' and we went on our way. I will definitely be back to do more workshops.When I  shared my makes with a group of friends over lunch -  they immediately gave me an order - for a batch of similar cards. What a bonus !
I need to buy one more kit and will have enough materials for my new commission. I also bought a Basic Tool Kit which give me the tools I need to make the extra cards and tags. I will be checking out the shop kits over the next few weeks for new making ideas''


Big thank you to Bella for taking time out to write this review.

Here are a few photos of some of the work produced during the workshop. The workshop title was PaperCraft (2) FROM SCRATCH. Kits will be available from the shops on this blog site in a few days.


Monday 18 May 2015

Make Art Monday

Hi Everyone
A quick look at something I've created over the week :


This eye is now part of a growing collection of facial feature pieces. I started trying to develop a technique for watercolour painting and am still using examples to copy. I haven't hit my own style yet. It's a short activity each week ie the actual painting element. I spend about 30 mins. I also spend about the same time looking for little exercises which will help. I'm now at the stage where I can look at a watercolour painting and understand how to paint it - which is amazing. I have made some significant progress but will continue looking and creating my facial features for a while yet. Eventually, I will be able to put them together and make my Bella portrait (the ultimate aim) - see back Monday posts for more on this.

Thanks for reading.

Friday 15 May 2015

Friday Project - earring posts

Hi Everyone
It's Friday already, how did that happen ? I'm sharing a little project today which I've been thinking about tackling for months. If you are a regular reader, you will know that I make lots of small Button earrings. I usually use Sterling silver posts when making the earrings - which I've bought 'ready made' However, this time I've made some posts from Sterling silver wire (0.8mm).
Having done a little research, it seems the standard length of a post is about 11mm. I tend not to stick to rules but the Professional Jewellers.com website gives this lovely little diagram to show the standard measurements for a earring post. I'm sharing this great little diagram showing all the details :


I followed this measurement and 'balled' the end of a length of wire, hammered the ball flat(ish) and used the resulting  shape to anchor the post into the Button bead of the earring. Fantastic result. I have a quality post FROM SCRATCH which appeals to my 'maker' principles. The photo story shows (bottom right) my post which has been balled at both ends. I did this to ensure both posts could be equal and were a good length for the size of the bead. After embedding the bead into the clay, I simply snipped half way along the post to separate and give two posts. It was a reasonable idea and worked well, so I will use it again.
 My only problem now is to create the butterfly back of the earring ! - no chance. I don't have the skill or the time to create the shape (at the moment) Im determined this will eventually happen. My 'butterfly back'  to come  will probably not be a traditional one but I'm sure I can make something. In the meantime I'm using a plastic back.
Take a look at my process. 


I'm feeling very smug with myself. It's no great achievement but I've done it and it's very satisfying - this is what MAKING  is all about.

Have a good weekend.
Thanks for reading.

Thursday 14 May 2015

Imitation Game (again)

Hi Everyone
I'm sharing yet more Striped Bead Necklaces (two to be exact) from my ongoing Imitation Game Series 1 beads. I think, this maybe the last beads to be developed in this collection. These necklaces are (I think) the most successful so far (although there are many other beads to be developed into pieces of jewellery). Since making the latest necklaces, I've worn nothing else. I've been searching each day for an outfit which will fit the beads !  I've also made a pair of simple, small stud earrings as part of this collection using the stripe surface pattern (also worn every day). These pieces are quite easy to wear and my usual all blue clothes tend to fit. Here they are :


The first image shows the use of round spacer beads to allow the larger striped 'barrel beads' to fit together. 


The second image shows longer 'tube beads' with more of the round spacers. I've used three round beads at one side of the necklace to give more of an 'edgy' design.

At the moment both necklaces are simply threaded onto wax cotton and tied with a knot. I'm considering adding a silver S clasp to both necklaces but I'm not sure ? I will wear them for a while and decide.

I will eventually 'officially' close the Striped Bead Collection after all the beads have been turned into pieces of jewellery until then I'm begining to experiment with the next Imitation Game (which I've already mentioned way back) called Starburst. Here is photo of the inspiration piece :


This second photo is also part of my initial plans


I'm going to start experimenting as soon as I can. Probably, it's going to be  Friday.
I hope to have something to share for next weeks Imitation Gamr post.

Thanks for reading.

Wednesday 13 May 2015

Paper Craft Tool Kit

Hi Everyone
If you look back yesterday, you will read that Bella (our virtual student Maker) went to a Paper Craft Wirkshop. She made a card and a couple of tags from the  Paper Craft Kit (2). The workshop provides all the necessary tools but Bella wanted to keep going with her paper crafting at home so bought one of the basic Paper Craft Tool Kits. These kits are available via the workshops or via the online shop (from 20/5/15) - there is a link on this blog to the shop.

This morning Im sharing the FROM SCRATCH Paper Craft Tool Kit.


The kit contains :
  1. Self healing cutting mat
  2. Craft knife
  3. Creasing tool
  4. Glue
  5. Metal ruler
  6. Metal tweezers
 This will form the basic kit but additional items will be available to accompany new projects. Each item in the basic kit will be available seperately.
Bella didn't have any of the items other than glue but she liked the particular glue used in the workshop so decided that would be a good purchase.
We will develop a carry bag for the kit in a future workshop and Bella has already booked her place.

Thanks for reading.

Tuesday 12 May 2015

The Making Framework

Hi Everyone
Today, Bella is going to a Making Framework Workshop. The workshop is a paper craft session and will produce a Thank You card and a couple of gift tags. Unfortunately, Bella can only stay for a short time (the session is a three hour session) because she is deep into her exam schedule. She is finding her interest in craft a great way of relaxing and taking time out of the revision cycle.

Bella will receive a kit with all the ingredients necessary to produce her card and tags. The tools are provided in the workshop but Bella is hoping to buy a basic tool kit designed for the Paper Craft sessions. Here is a quick look at the paper kit :


She is hoping to check out any techniques which she needs to discuss in the first hour of the session. She knows that there will be lots of opportunity to get more support In the future from the this blog which will support the Framework.

I'm going to provide a range of  'technique and tips' on the Wednesday blog slot (starting next week). These slots will link with Making Kits which will be available in my online shops. I will provide links as the kits become available.
Here is a quick look at the card and tags samples from the workshop.


Bella has agreed to write a review of her time in the workshop and share her card and tags next time. We will look forward to hearing about her experience.

Thanks for reading.

Monday 11 May 2015

Make Art Monday

Hi Everyone
Monday means it's  my Make Art Monday series and I'm sharing a watercolour mouth today. Im still in the experimental stage before putting my practice into the final painting. If you read back you will know that I'm preparing to make a large watercolour painting of Bella Mitchell (a virtual student maker and favourite character). Here she is before being painted. 


I'm  not sure if the mouth works that well but I've changed the whole shape of my watercolour layers and I think I have a plan.


For me the watercolour thing is about being confident of what I'm doing and letting go of the control. It's still in the 'anything could happen' phase ! I still need more practice and will look for more little practice exercises. I have a small space in my week for painting but I can see some improvement and will keep going.

Thanks for reading.


Friday 8 May 2015

Friday Mini Project

Hi Everyone
My Friday Mini Project is another clay flower. I'm going to make some very small flowers today. They will be not be a actual flower (I will have fun inventing a name) but I'm imagining they will form flowers for a little pot. I'm going for a series of colours and will slightly alter the petal colours within each flower. My plan is to display several flowers in a small, painted flower pot. The flowers will have wrapped pipecleaner stems. My finished pots will be used as a decorative display item. I will try out a few different petal shapes before I decide on the final one. The type of look Im going for is similar to the ones in my collage (top left). I love the little galvanised tubs.


I will also develop my flowers into little posies  as decoration for gift boxes. I'm hoping I can come up with lots of other ideas while I experiment.

Thanks for reading, have a great weekend.

Thursday 7 May 2015

Imitation Game Stripes

Hi Everyone
I'm sharing one of my latest bracelets from the beads that I made last week. These beads form part of my Stripes Collection. My initial plan was three bracelets using silver clasps ....... but things have changed and  I think the beads maybe too large for a clasp bracelet. My first bracelet is using the smaller tube beads with small flat discs. These size beads work well - any larger and they don't work around a wrist. I think adding the spacer flat beads is a good move. They give the bracelet a linked structure and contrast well with the tube beads.


I haven't dismissed the clasp style (for a bracelet)  but I need to experiment. In the meantime, I've come up with an idea for a necklace. The necklace will incorporate my silver clasps.


I like the necklace and its a good length for me. The clasp is probably not necessary as I can get it over my head (just) however, the weight of the silver clasp adds to the design and makes the necklace 'sit' nicely.

I have another idea for a shorter necklace and will use the elastic threading this time. I'm hoping to complete this third item today and develop a few more beads in some other colours. I'm quite keen to integrate some of the other Stripe beads into a similar range of items which will all become part of a Stripe Collection. I want to produce some special packaging and display too but ........ this will have to wait.

Thanks for reading.

Wednesday 6 May 2015

Tools and Technique Day

Hi Everyone
I'm choosing a couple of simple tools today for my post. The first is a simple 'push stamp' tool - used mostly by sugar craft folk. I'm using it to make some simple, quite thin round polymer beads. The thin polymer clay would not keep its shape without the use of the push stamp and although I don't want exactly the same beads, I'd like a range of similar sizes and a round shape. I have several sizes of this tool which is perfect for my plan. Im using three different size round shapes for the job - the sizes correspond with the size of the stripe beads.  The flat beads will be used as spacer beads in the between some new stripe beads (part of my current Imitation Game project).

These particular beads have taken very little clay and are a quick make, I made and finished  the lot (to this stage) within an hour.
                          

I wanted to have quite a rough surface finish to add a little Titan Buff acrylic paint. This will add another dimension to the bead and link it with the striped beads (also have an acrylic layer of Titan Buff). I was in two minds about putting the flat beads through the tumbler but in the end just worked each bead with a light sandpaper strip. 
The nail files are my second tool. They are brilliant for small sanding jobs and are relatively cheap. The ones I use are coloured on one side and often I use them to add a slight contrast to a bead. If a bright colour is sanded with a darker colour nail file the coloured sand adds a little contrast which is pleasing and adds to the decoration of the surface. It's a subtle difference but I like the result.


I'm hoping the new beads (after a quick seal and polish) can be put together later today. I have plans for a bracelet and a necklace. I want the bracelet to be threaded onto stretchy thread but may put the larger beads onto a suede or leather thong. Still undecided ? I will test out a few experiments.

Thanks for reading.

Tuesday 5 May 2015

Making Framework

Hi Everyone
I'm giving a bit of background for the Making Framework Initiative today. I've mentioned the idea a few times but this little piece firms up the plan.This initiative is about persuading as many people as possible to get involved in making things. It doesn't really matter what you make as long as you are 'making'.

 I believe the process of making is important. I feel its key to start with basic tools and materials rather than simply fitting things (already made) together. There are many craft kits out there but most feature components which fit together. In my world, the approach is much more about starting from scratch and making the components themselves. My approach demands a different mind set ie it about making something beautiful or useful or imaginative etc. using a basic material and changing it. The reason for making needs only to be important to the maker. Basic materials will be paper or wool or clay etc. Sometimes, it's not possible to make the component (yet) eg a silver jewellery clasp. This maybe because either the skills are not yet developed or the tools and materials are specialist and/or possibly not available (yet). I'm suggesting, however, that these higher level skills and resources are just a step away and anything is possible.

The mind set of the maker becomes an inspirational thing and creativity flows. The early maker adopters are positively evangelical - it's a scary thing to observe. A sense or personal achievement often develops very quickly and the maker becomes open to all kinds of creative stimulation. There is no place for the craft purist here. We are talking all crafts and all making projects. All such projects are to be tickled with enthusiasm. The maker becomes an artist maker very quickly and the world is a different place. Everyday items are all up for crafting. The maker is a creative thinker and a much nicer person -perhaps that going a bit far !
In the begining, the skills of the maker are not hugely important although it's more encouraging to make something which you can be proud of rather than throwing any made item in the bin at the earliest opportunity. To facilitate this, I've come up with a number of making projects (about 25 so far) which covers many recognisable crafts. Each project is designed as either a complete starter project or is slightly more involved and will be called a level 1-3. All projects can be tackled by anyone at any time, although, the starter is designed to be an introduction to a particular craft. 
I'm running some regular local workshops (short build up programmes) and a series of Make and Take Events (stand alone) to support the projects. I'm also developing kits and support materials which will be available on line. There will be a book as well as an ebook to underpin the projects. I hope there will be a series of books but the first one will look a bit like this :


The cover may change a little but I like the bright colours and it's one of my paintings - so I can do as I like with it. I may need to add or change elements and I can easily give myself permission. It's also going to be one of the projects.

Monday 4 May 2015

Make Art Monday

Hi Everyone
I'm almost having a Bank Hiliday today - just a bit of indulgent painting for myself. We have lots of family things going on today, everyone doing something different so alongside being a taxi, a cook and a teacher - Im doing a bit of practice painting for my recent watercolour portraits. 
My aim today, is to paint lots of eyes and possibly a mouth. I've followed a little exercise from one of my books and will do lots more. I want to develop a greater understanding of the process and find my own way of doing facial features.
Here is a quick look at my efforts so far :


I'm just doing what the exercise tells me but I'm pleased with the results. I will keep going using different colours and see what happens.

Thanks for reading.

Friday 1 May 2015

Friday - mini project

Hi Everyone
My mini project today is the clay flower series. 
I'm back (sort of) on track with the clay flower development. This is a series of little clay flower projects which will be adapted for various packaging and display purposes. I've already developed a Blue Poppy and today will be the Pink Chrysanthamum (previously scheduled for a few weeks ago) - better late than never !
Here is a view of the flower 'to be' -


This photo shows a red flower but my first attempt with this design will be pink. I'm hopeful I can make a good job and develop a series of different pink flowers of different sizes. 
My task today will be a small flower - just to get the shape of the petals and understand how they need to be arranged. I have a new little tool for the job -


I'm going to time the job (including preparation/clearing up etc) - it's important that I can develop the flowers in an hour (post prototype). I will probably take my time with the first one and enjoy the experience. Once I get going, I know I will love making this flower.

Its been quite a busy week this week and I'm looking forward to a relaxing few days - not sure how many times I've planned that ! What could possibly go wrong ?

Have a good weekend and thanks for reading.